8352. Building CRUD Application With AngularAngular, MEAN, and Node.js
Build web CRUD application with Angular and RESTful API.
1. CRUD Application
CRUD stands for Create, Read, Update and Delete. Which are the basic operations that a simple web app would be designed to achieve. In this tutorial, we will learn how to use Angular and RESTful web service to build such web application.
2. Angular Project
2.1 Creating New Project
In terminal, create new angular app named ‘AngularTutorial’.
$ ng new AngularTutorial
2.2 Components
Then, create 5 components.
$ cd AngularTutorial
$ ng g component header
$ ng g component footer
$ ng g component mainpage
$ ng g component productlist
$ ng g component productadd
Add following content to ‘header.component.html’. We added three buttons linked to Home, Product List page and Product Add page. Use ‘routerLink’ attribute to achieve the navigation purpose.
<div class="container">
  <h2>Angular Tutorial - Product Management</h2>
  <button type="button" class="btn btn-info" routerLink="">Home</button>
  <button type="button" class="btn btn-info" routerLink="productlist">List</button>
  <button type="button" class="btn btn-info" routerLink="productadd">Create</button>
</div>
<hr/>
Add following content to ‘mainpage.component.html’.
<div class="jumbotron text-center">
  <h1>Product Management</h1>
  <p>Built with Angular and RESTful API(Express & MongoDB)</p>
</div>
Add following content to ‘footer.component.html’.
<hr/>
<footer class="container-fluid text-center">
<p>© 2018 jojozhuang.github.io, All rights reserved.</p>
</footer>
2.3 Routing
In ‘app.module.ts’, include the router module and define route array ‘Routes’.
import { BrowserModule } from '@angular/platform-browser';
import { NgModule } from '@angular/core';
import { RouterModule, Routes} from '@angular/router';

import { AppComponent } from './app.component';
import { MainpageComponent } from './mainpage/mainpage.component';
import { HeaderComponent } from './header/header.component';
import { FooterComponent } from './footer/footer.component';
import { ProductaddComponent } from './productadd/productadd.component';
import { ProductlistComponent } from './productlist/productlist.component';

const appRoutes: Routes = [
  { path: '', component: MainpageComponent },
  { path: 'mainpage', component: MainpageComponent },
  { path: 'productlist', component: ProductlistComponent },
  { path: 'productadd', component: ProductaddComponent },
  { path: 'productadd/:id', component: ProductaddComponent },
  // otherwise redirect to home
  {path: '**', redirectTo: ''}
];

@NgModule({
  declarations: [
    AppComponent,
    MainpageComponent,
    HeaderComponent,
    FooterComponent,
    ProductaddComponent,
    ProductlistComponent
  ],
  imports: [
    BrowserModule,
    RouterModule.forRoot(appRoutes)
  ],
  providers: [],
  bootstrap: [AppComponent]
})
export class AppModule { }
Apply the router by updating ./app/app.component.html with the following content.
<div class="mainpage">
  <app-header></app-header>
  <router-outlet></router-outlet>
  <app-footer></app-footer>
</div>
2.4 BootStrap CSS
Install bootstrap related packages to the project.
$ npm install ngx-bootstrap bootstrap --save
Open ‘angular-cli.json’ and insert a new entry into the styles array.
  "styles": [
    "styles.css",
    "../node_modules/bootstrap/dist/css/bootstrap.min.css"
],
2.5 Install Material Package
We will use the Alert component provided by Angular. We need to install material package.
$ npm install --save @angular/material @angular/cdk
In ‘app.module.ts’, inclucde ‘AlertModule’.
import { AlertModule } from 'ngx-bootstrap';

...

@NgModule({
  ...,

  imports: [
    BrowserModule,
    RouterModule.forRoot(appRoutes),
    AlertModule.forRoot()
  ],
  providers: [],
  bootstrap: [AppComponent]
})
2.6 Serving at Specified Port
Open .angular-cli.json, add ‘serve’ underneath ‘defaults’ as follows. This app will be served at port ‘12080’. By default, it is served at port 3000.
"defaults": {
  "serve": {
    "port": 12080,
    "host": "localhost"
  },
  "styleExt": "css",
  "component": {}
}
2.7 Model Classes
Create file named ‘models.ts’ in the source root folder ‘./src/app/’. Add two classes. Class ‘Product’ has three properties: id, name and price. Class ‘ResponseResult’ has two properties, status and message.
export class Product {
  constructor(public _id: string, public name: string, public price: number) {}
}

export class ResponseResult {
  constructor(public status: number, public message: string) {}
}
3. Http Service
3.1 Http Module
In ‘app.module.ts’, include http module ‘HttpClientModule’ for sending http requests to external RESTful web services.
import { HttpClientModule } from '@angular/common/http';

...

@NgModule({
  ...,

  imports: [
    BrowserModule,
    RouterModule.forRoot(appRoutes),
    AlertModule.forRoot(),
    HttpClientModule
  ],
  providers: [],
  bootstrap: [AppComponent]
})
3.2 Services
Create service for CRUD operations.
$ ng g service product
Two new files ‘product.service.specs.ts’ and ‘product.service.ts’ are created in the ‘./src/app/’ folder.
3.3 Product Http Service
Edit ‘product.service.ts’ as follows.
import { Injectable } from '@angular/core';
import { Http, Response, Headers, URLSearchParams, RequestOptions } from '@angular/http';
import { Observable } from 'rxjs';
import { HttpClient } from '@angular/common/http';
import 'rxjs/add/operator/map';

import { Product, ResponseResult } from './models';

@Injectable()
export class ProductService {
  //URL for CRUD operations
  baseUrl = "http://localhost:5000/";
  apiUrl = this.baseUrl + "api/product";

  //Create constructor to get Http instance
  constructor(private http: HttpClient) {
  }
  //Fetch all products
  getProducts(): Observable<Product[]> {
    return this.http.get<Product[]>(this.apiUrl)
  }
  //Create product
  createProduct(product: Product): Observable<any> {
    return this.http.post(this.apiUrl, product, {observe: 'response'})
           .map(res => res.status)
  }
  //Fetch product by id
  getProductById(pid: string): Observable<Product> {
    return this.http.get<Product>(this.apiUrl + "/" + pid)
  }
  //Update product
  updateProduct(product: Product): Observable<any> {
    return this.http.put(this.apiUrl + "/" + product._id, product, {observe: 'response'})
           .map(res => res.status)
  }
  //Delete product
  deleteProductById(pid: string): Observable<any> {
    return this.http.delete(this.apiUrl +"/"+ pid, {observe: 'response'})
           .map(res => res.status)
  }
}
The following points need to be noted about the above code.
- Define urls for APIs
- Use the injected HttpClient to send http requests.
- Define 5 CRUD methods(GetAll, GetOne, Create, Update and Delete).
- Use Observable as return type.
Register the http service to NgModule. In ‘app.module.ts’, add ‘ProductService’ to ‘providers’.
import { ProductService } from './product.service';

...

@NgModule({
  ...,

  providers: [ProductService],
  bootstrap: [AppComponent]
})
3.4 Intercept HTTP Requests
In Angular 4.3 or higher version, you can use HttpInterceptor to intercept and modify HTTP requests globally. In this application, I use it to handle http request error globally. In folder ‘./src/app’, create file named ‘http.interceptor.ts’ with following content.
import { Injectable } from '@angular/core';
import { HttpEvent, HttpInterceptor, HttpHandler, HttpRequest, HttpResponse, HttpErrorResponse, HTTP_INTERCEPTORS } from '@angular/common/http';
import { Observable } from 'rxjs/Observable';
import { _throw } from 'rxjs/observable/throw';
import 'rxjs/add/operator/do';
import 'rxjs/add/operator/catch';
import { ResponseResult } from './models';

/**
 * Intercepts the HTTP responses, and in case that an error/exception is thrown, handles it
 * and extract the relevant information of it.
 */
@Injectable()
export class ErrorInterceptor implements HttpInterceptor {
    /**
     * Intercepts an outgoing HTTP request, executes it and handles any error that could be triggered in execution.
     * @see HttpInterceptor
     * @param request the outgoing HTTP request
     * @param next a HTTP request handler
     */
    intercept(request: HttpRequest<any>, next: HttpHandler): Observable<HttpEvent<any>> {
        // add a custom header
        const customReq = request.clone({
            //headers: request.headers.set('Content-Type', 'application/json')
        });
        //return next.handle(request);
        return next.handle(customReq)
            .do((ev: HttpEvent<any>) => {
                console.log(customReq);
                /*if (ev instanceof HttpResponse) {
                    //console.error(ev);
                    //console.log('processing response', ev);
                }*/
            })
            .catch(response => {
                let respResult = new ResponseResult(200, "");
                console.error(response);
                if (response instanceof HttpErrorResponse) {
                    const err = response.message || JSON.stringify(response.error);
                    respResult.statusCode = response.status;
                    respResult.message = `${response.statusText || ''} Details: ${err}`;
                } else {
                    respResult.statusCode = 400
                    respResult.message = response.message ? response.message : response.toString();
                }
                console.error(respResult.message);
                return _throw(respResult);
            });
    }
}

/**
 * Provider POJO for the interceptor
 */
export const ErrorInterceptorProvider = {
    provide: HTTP_INTERCEPTORS,
    useClass: ErrorInterceptor,
    multi: true,
};
- If error is caught, we get the status and error message, then return the ResponseResult object.
Register the customized HttpInterceptor to NgModule. In ‘app.module.ts’, append ‘ErrorInterceptorProvider’ to ‘providers’.
import { ErrorInterceptorProvider } from './http.interceptor';

...

@NgModule({
  ...,

  providers: [ProductService, ErrorInterceptorProvider],
  bootstrap: [AppComponent]
})
4. Products Management
4.1 Product List
Edit ‘productlist.component.ts’ as follows.
import { Component, OnInit } from "@angular/core";
import { ProductService } from "./../product.service";

@Component({
  selector: "app-productlist",
  templateUrl: "./productlist.component.html",
  styleUrls: ["./productlist.component.css"]
})
export class ProductlistComponent implements OnInit {
  constructor(private service: ProductService) {}
  products;
  status: number;
  message: string;

  ngOnInit() {
    this.getProducts();
  }
  //Fetch all products
  getProducts() {
    this.service.getProducts().subscribe(
      data => (this.products = data),
      error => {
        this.status = error.status;
        this.message = error.message;
      }
    );
  }

  deleteProduct(event) {
    if (window.confirm("Are you sure to delete this product?")) {
      //console.log(event.id);
      this.service.deleteProductById(event.id).subscribe(
        successCode => {
          this.status = successCode;
          this.getProducts();
        },
        error => {
          this.status = error.status;
          this.message = error.message;
        }
      );
    }
  }
}
The following points need to be noted about the above code.
- Include ProductService for sending http requests to get data.
- Two methods are defined, getProducts() and deleteProduct(event).
- Define a variable ‘products’ to pass data to html.
Add following content to ‘productlist.component.html’.
<div class="container">
  <h2>Products</h2>
  <p>Backend RESTful API: http://localhost:5000/api/product</p>
  <div *ngIf="status || errmsg">
    <alert *ngIf="status != 200" type="danger"></alert>
    <alert *ngIf="status === 200" type="success">Product has been deleted successfully.</alert>
  </div>
  <table class="table">
    <thead>
      <tr>
        <th>Product ID</th>
        <th>Name</th>
        <th>Price</th>
        <th>Operations</th>
      </tr>
    </thead>
    <tbody *ngFor="let product of products">
      <tr>
        <td></td>
        <td></td>
        <td><span></span></td>
        <td>
          <button type="button" class="btn btn-success" [routerLink]="['/productadd', product._id ]">Edit</button>
          <button type="button" class="btn btn-danger" (click)="deleteProduct({ event:$event, id: product._id })">Delete</button>
        </td>
      </tr>
    </tbody>
  </table>
</div>
The following points need to be noted about the above code.
- Define a table to display products.
- Add two buttons for each row to edit or delete product.
- Show error message if applicable.
4.2 Product Creation/Update
Edit ‘productadd.component.ts’ as follows.
import { Component, OnInit } from "@angular/core";
import { FormGroup, FormControl, Validators } from "@angular/forms";
import { Router, ActivatedRoute, Params } from "@angular/router";

import { ProductService } from "./../product.service";

@Component({
  selector: "app-productadd",
  templateUrl: "./productadd.component.html",
  styleUrls: ["./productadd.component.css"]
})
export class ProductaddComponent implements OnInit {
  status: number;
  message: string;
  _id;

  //Create form
  productForm = new FormGroup({
    _id: new FormControl(""),
    name: new FormControl(
      "",
      Validators.compose([Validators.required, Validators.minLength(3)])
    ),
    price: new FormControl(
      "",
      Validators.compose([
        Validators.required,
        Validators.pattern("[0-9]+"),
        Validators.min(0),
        Validators.max(2147483647)
      ])
    )
  });

  constructor(
    private service: ProductService,
    private router: Router,
    private route: ActivatedRoute
  ) {}
  ngOnInit() {
    this._id = this.route.snapshot.paramMap.get("_id");
    //console.log(this._id);
    if (this._id != null) {
      this.service.getProductById(this._id).subscribe(
        product => {
          //console.log(product);
          this.productForm.setValue({
            _id: product._id,
            name: product.name,
            price: product.price
          });
        },
        error => {
          this.status = error.status;
          this.message = error.message;
        }
      );
    }
  }

  //Handle create and update product
  onClickSubmit() {
    if (this.productForm.invalid) {
      return; //Validation failed, exit from method.
    }
    //Form is valid, now perform create or update
    let product = this.productForm.value;
    //console.log(product);
    if (product._id == null || product._id == "") {
      //Create product
      product._id = "";
      this.service.createProduct(product).subscribe(
        status => {
          this.status = status;
          this.router.navigate(["productlist"]);
        },
        error => {
          this.status = error.status;
          this.message = error.message;
        }
      );
    } else {
      //Update product
      this.service.updateProduct(product).subscribe(
        status => {
          this.status = status;
          this.router.navigate(["productlist"]);
        },
        error => {
          this.status = error.statusCode;
          this.message = error.message;
        }
      );
    }
  }
}
The following points need to be noted about the above code.
- Use FormGroup to transfer data to UI.
- In method ‘ngOnInit()’, get the product and assign values to form group.
- Method ‘onClickSubmit()’ handles two operations, create product or update product.
Add following content to ‘productadd.component.html’.
<div class="container">
  <h2 *ngIf="!_id">Create New Product</h2>
  <h2 *ngIf="_id">Edit Product</h2>
  <div *ngIf="status">
    <alert *ngIf="status != 200" type="danger"></alert>
    <alert *ngIf="status === 200 && !_id" type="success">200: Product has been created successfully.</alert>
    <alert *ngIf="status === 200 && _id" type="success">200: Product has been updated successfully.</alert>
  </div>
  <form *ngIf="status != 404" class="form-horizontal" [formGroup]="productForm" (ngSubmit)="onClickSubmit()">
    <div *ngIf="_id" class="form-group">
      <label class="control-label col-sm-2" for="_id">Product ID:</label>
      <div class="col-sm-10">
        <input class="form-control" disabled="true" type="text" name="_id" formControlName="_id" />
      </div>
    </div>
    <div class="form-group">
      <label class="control-label col-sm-2" for="name">Product Name:</label>
      <div class="col-sm-10">
        <input class="form-control" placeholder="Enter product name" type="text" name="name" formControlName="name" />
      </div>
    </div>
    <div class="form-group">
      <label class="control-label col-sm-2" for="price">Price:</label>
      <div class="col-sm-10">
        <input class="form-control" placeholder="Enter price" type="text" name="price" formControlName="price" />
      </div>
    </div>
    <div class="form-group">
      <div class="col-sm-offset-2 col-sm-10">
        <input type="submit" [disabled]="productForm.invalid" class="btn btn-primary" value="Save">
      </div>
    </div>
  </form>
</div>
The following points need to be noted about the above code.
- For each property of the product, we define a label and input box for it.
- Use productForm to display product if it is in edit mode.
- If Save button is clicked. Function ‘onClickSubmit()’ will be called.
- Show error message if applicable.
As we are using the formGroup attribute in form tag, we need to import ReactiveFormsModule. Otherwise, you will get Can’t bind to ‘formGroup’ since it isn’t a known property of ‘form’ error and the page will be blank.
In ‘app.module.ts’, include ‘ReactiveFormsModule’.
import { ReactiveFormsModule } from '@angular/forms';

...

@NgModule({
  ...,

  imports: [
    BrowserModule,
    ReactiveFormsModule,
    RouterModule.forRoot(appRoutes),
    AlertModule.forRoot(),
    HttpClientModule
  ],
  ...
})
5. Running and Testing
Start the RESTful service first, and start this Angular app, serve it at port 12080.
$ ng serve
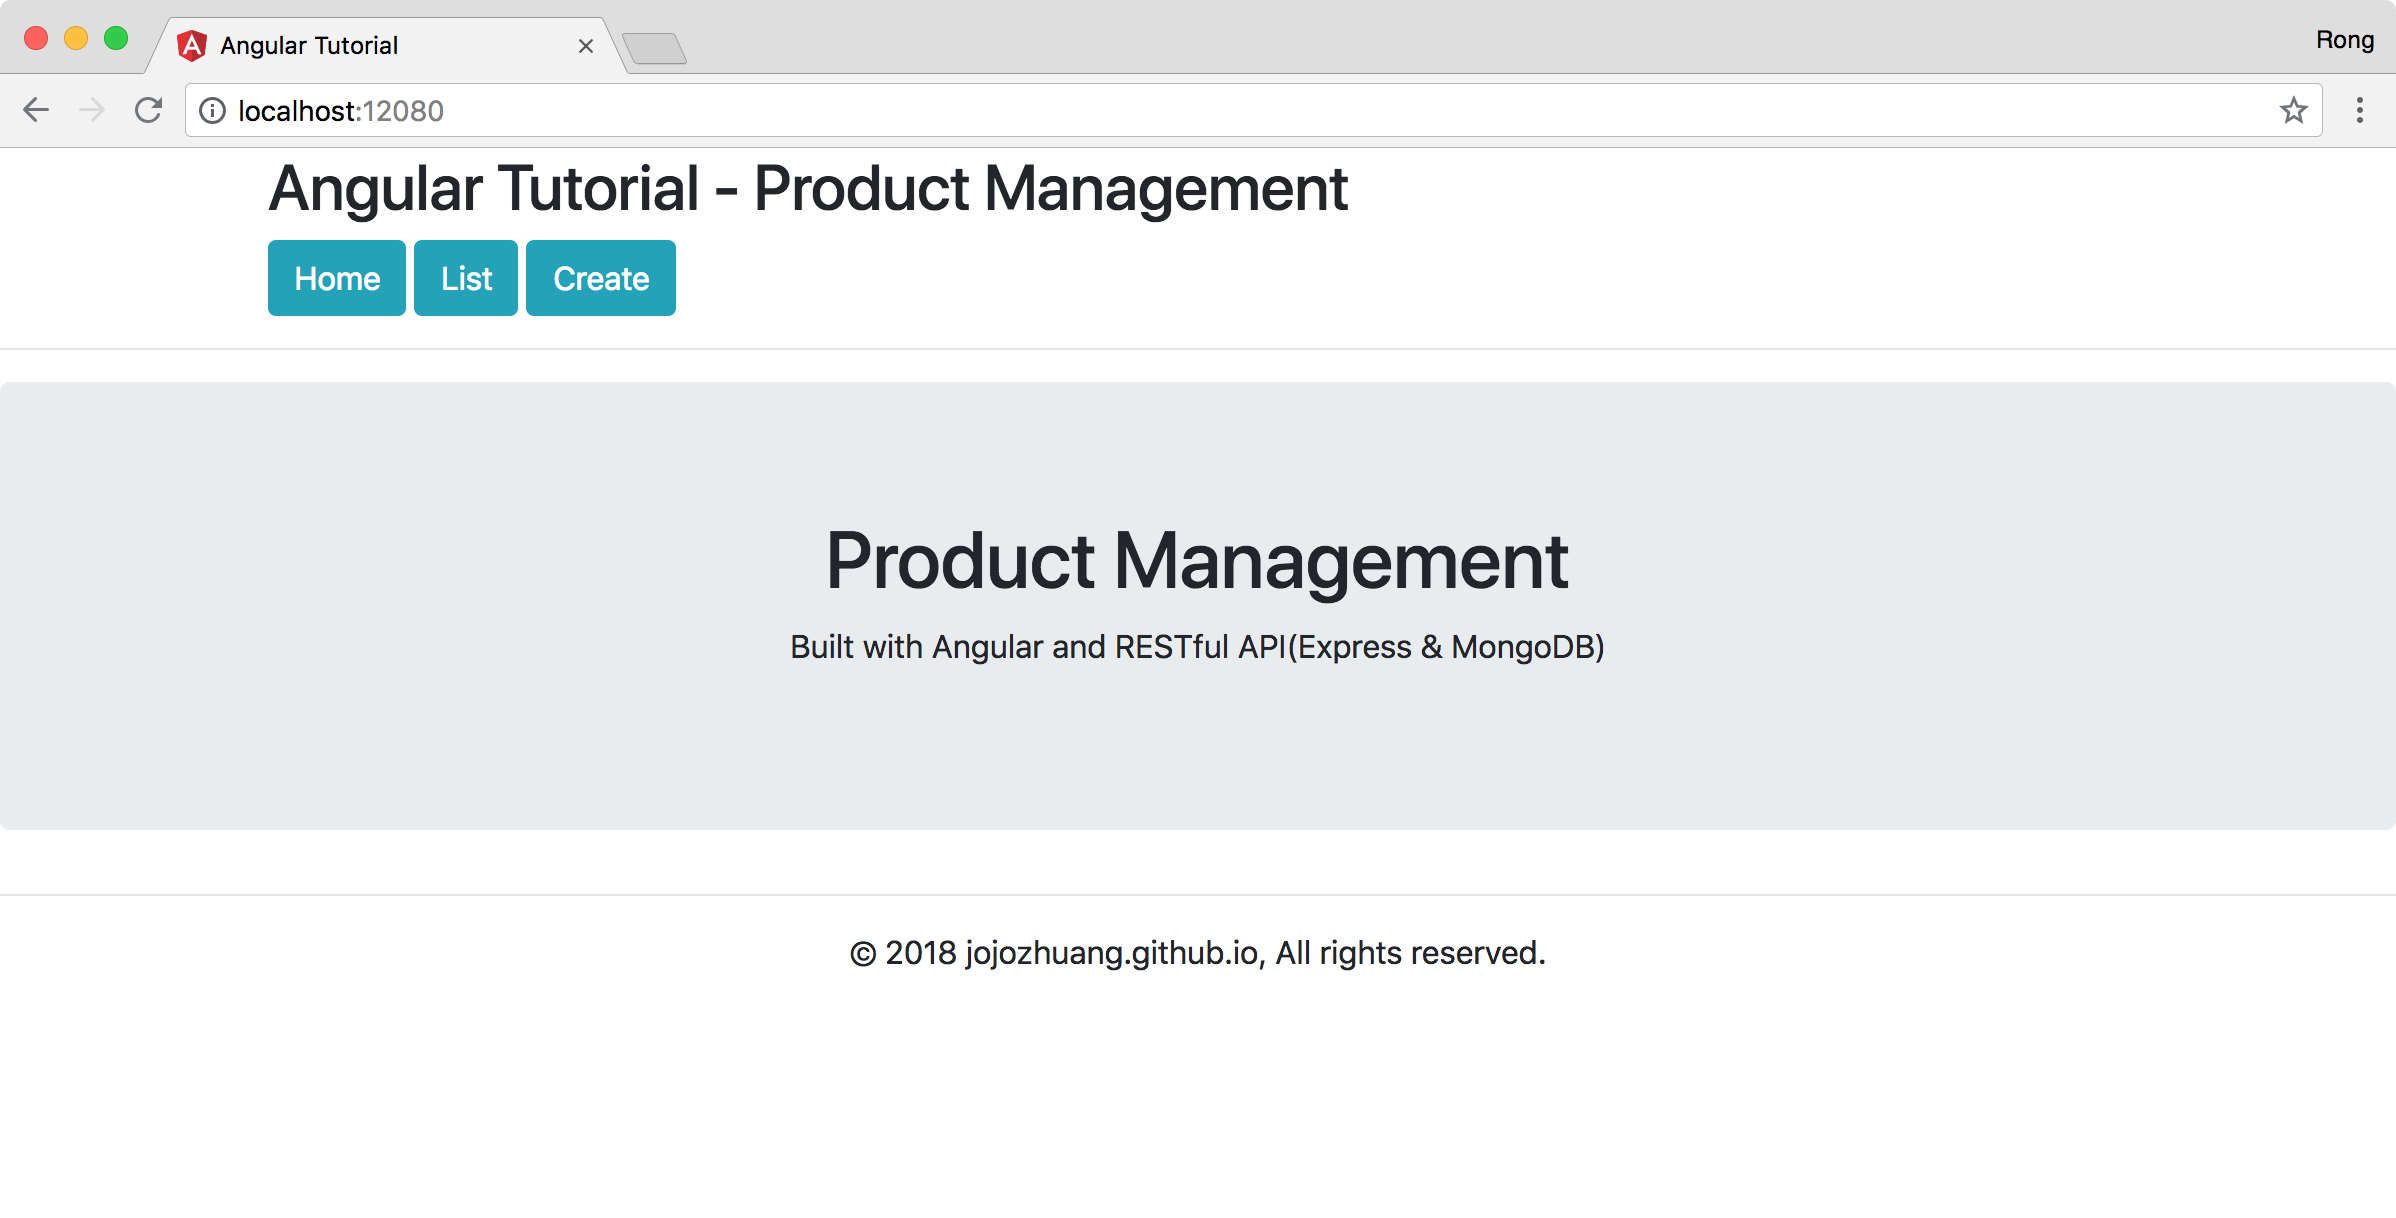
Open web browser, access ‘http://localhost:12080/’.
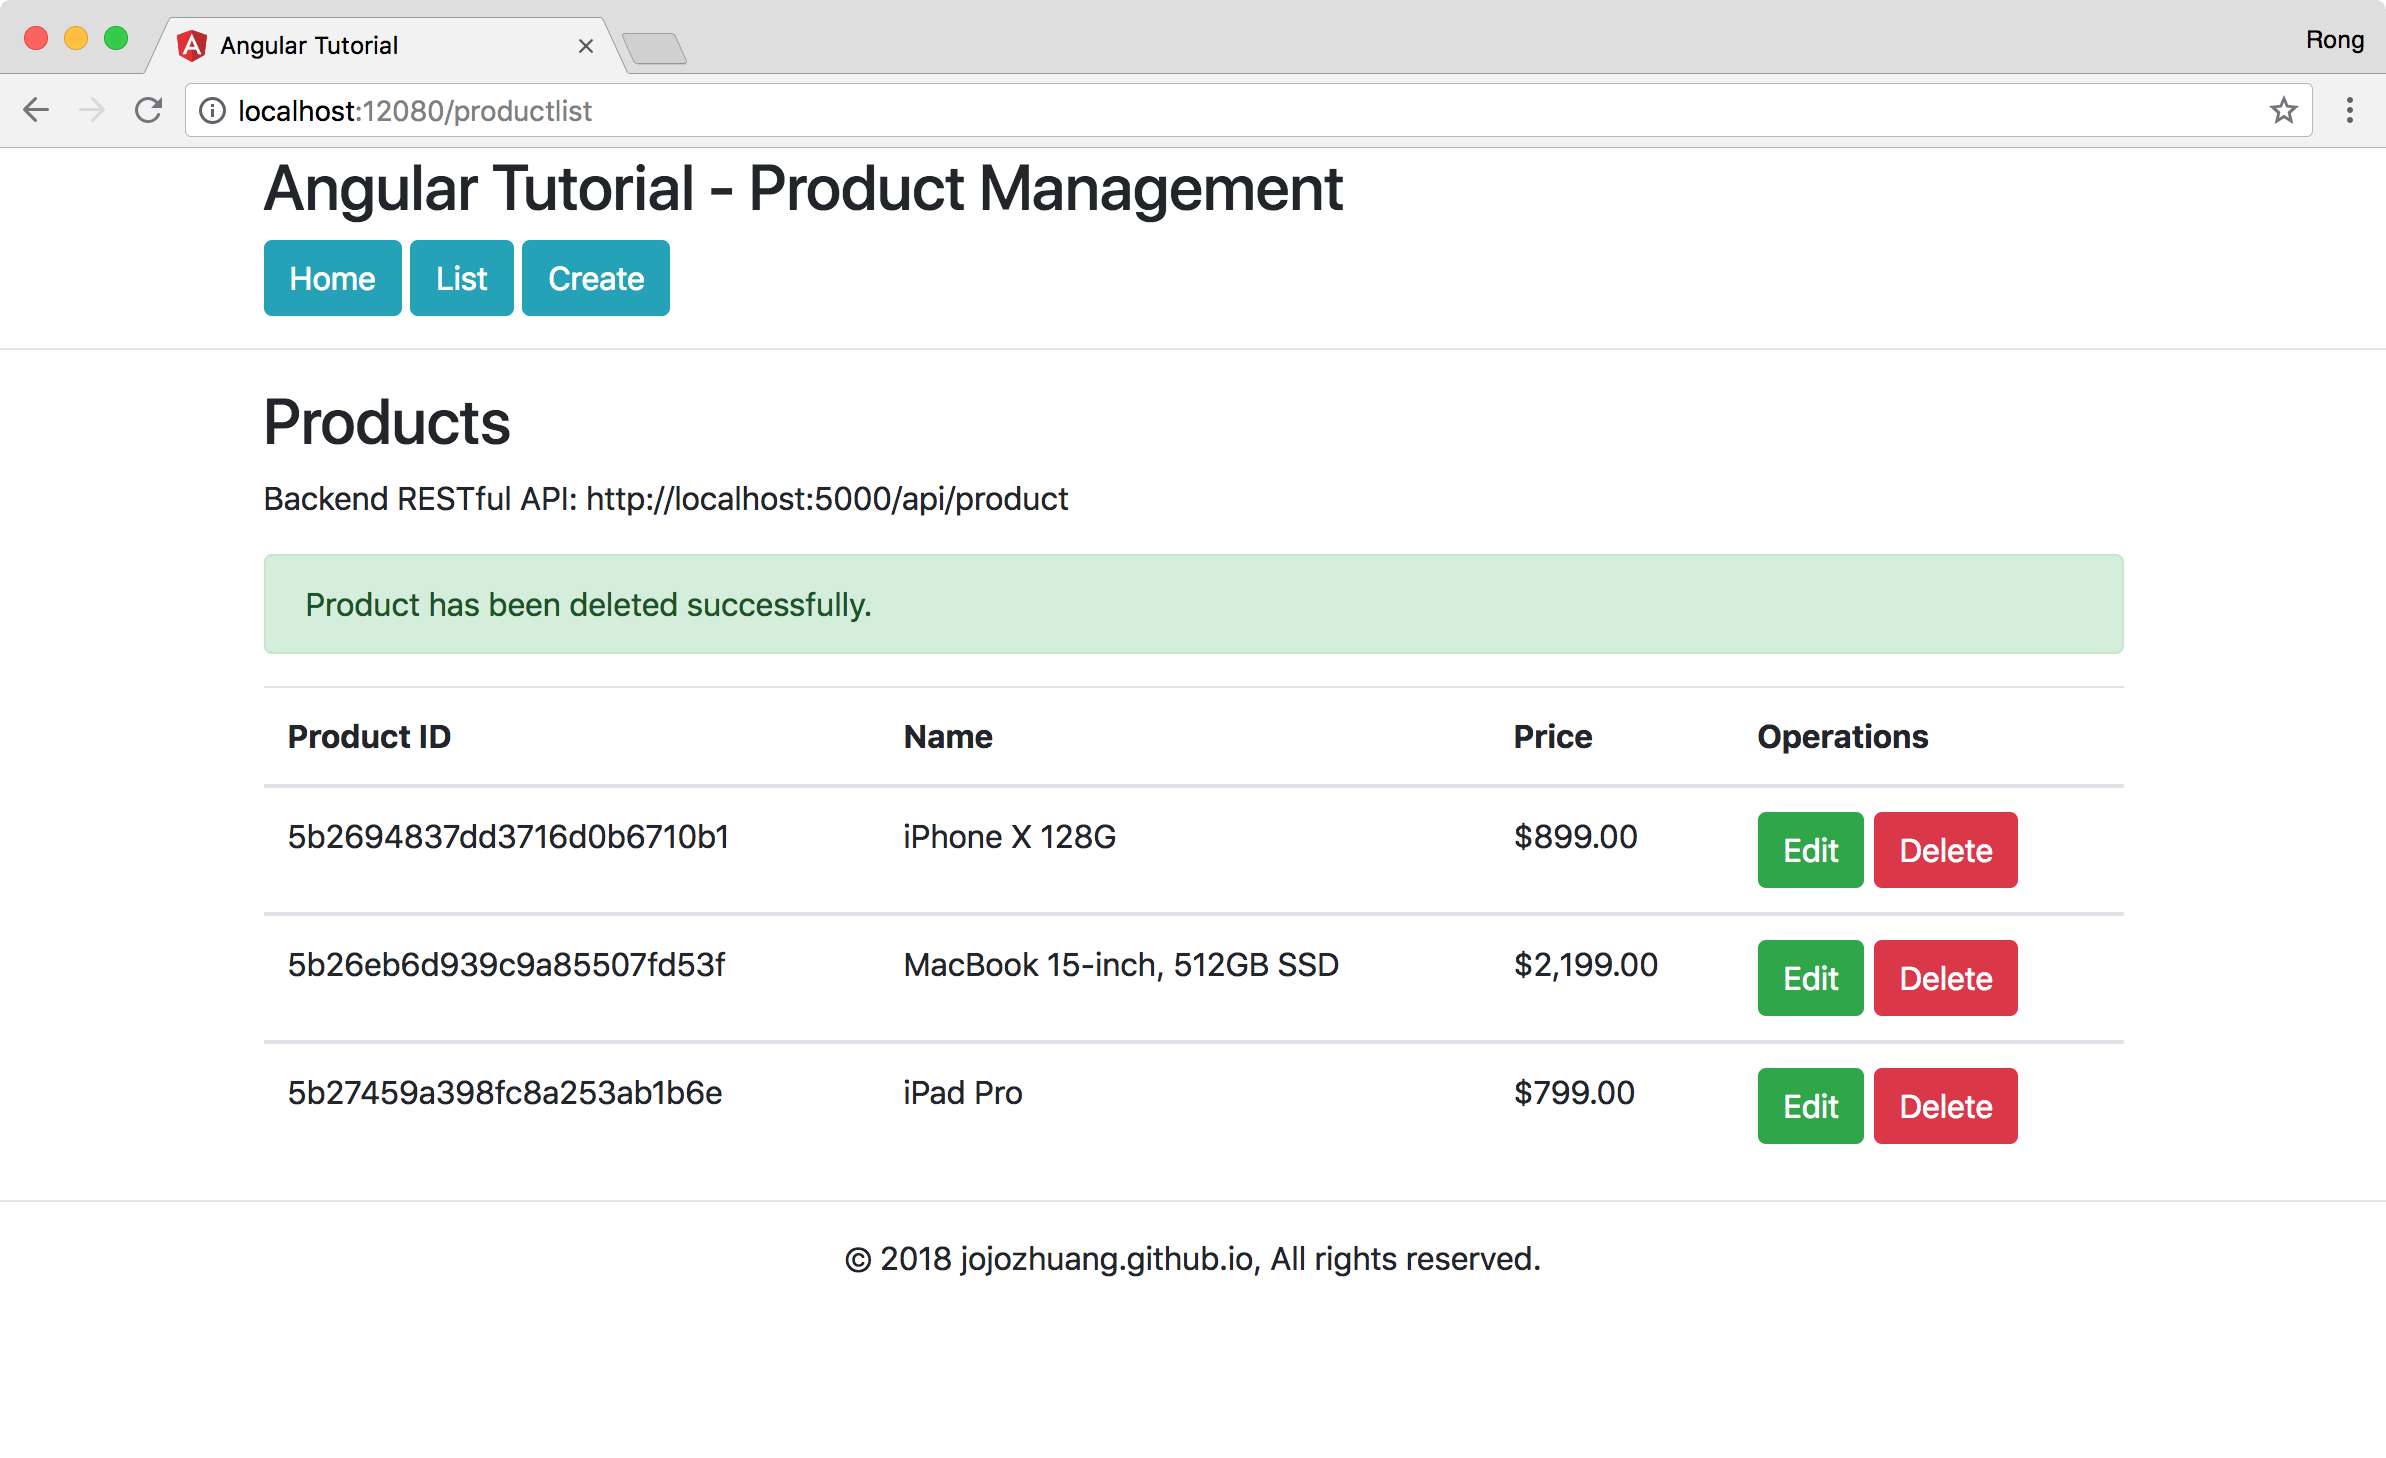
 Click the List button. There are three products with images.
 Click the ‘Create’ button, input product name and price.
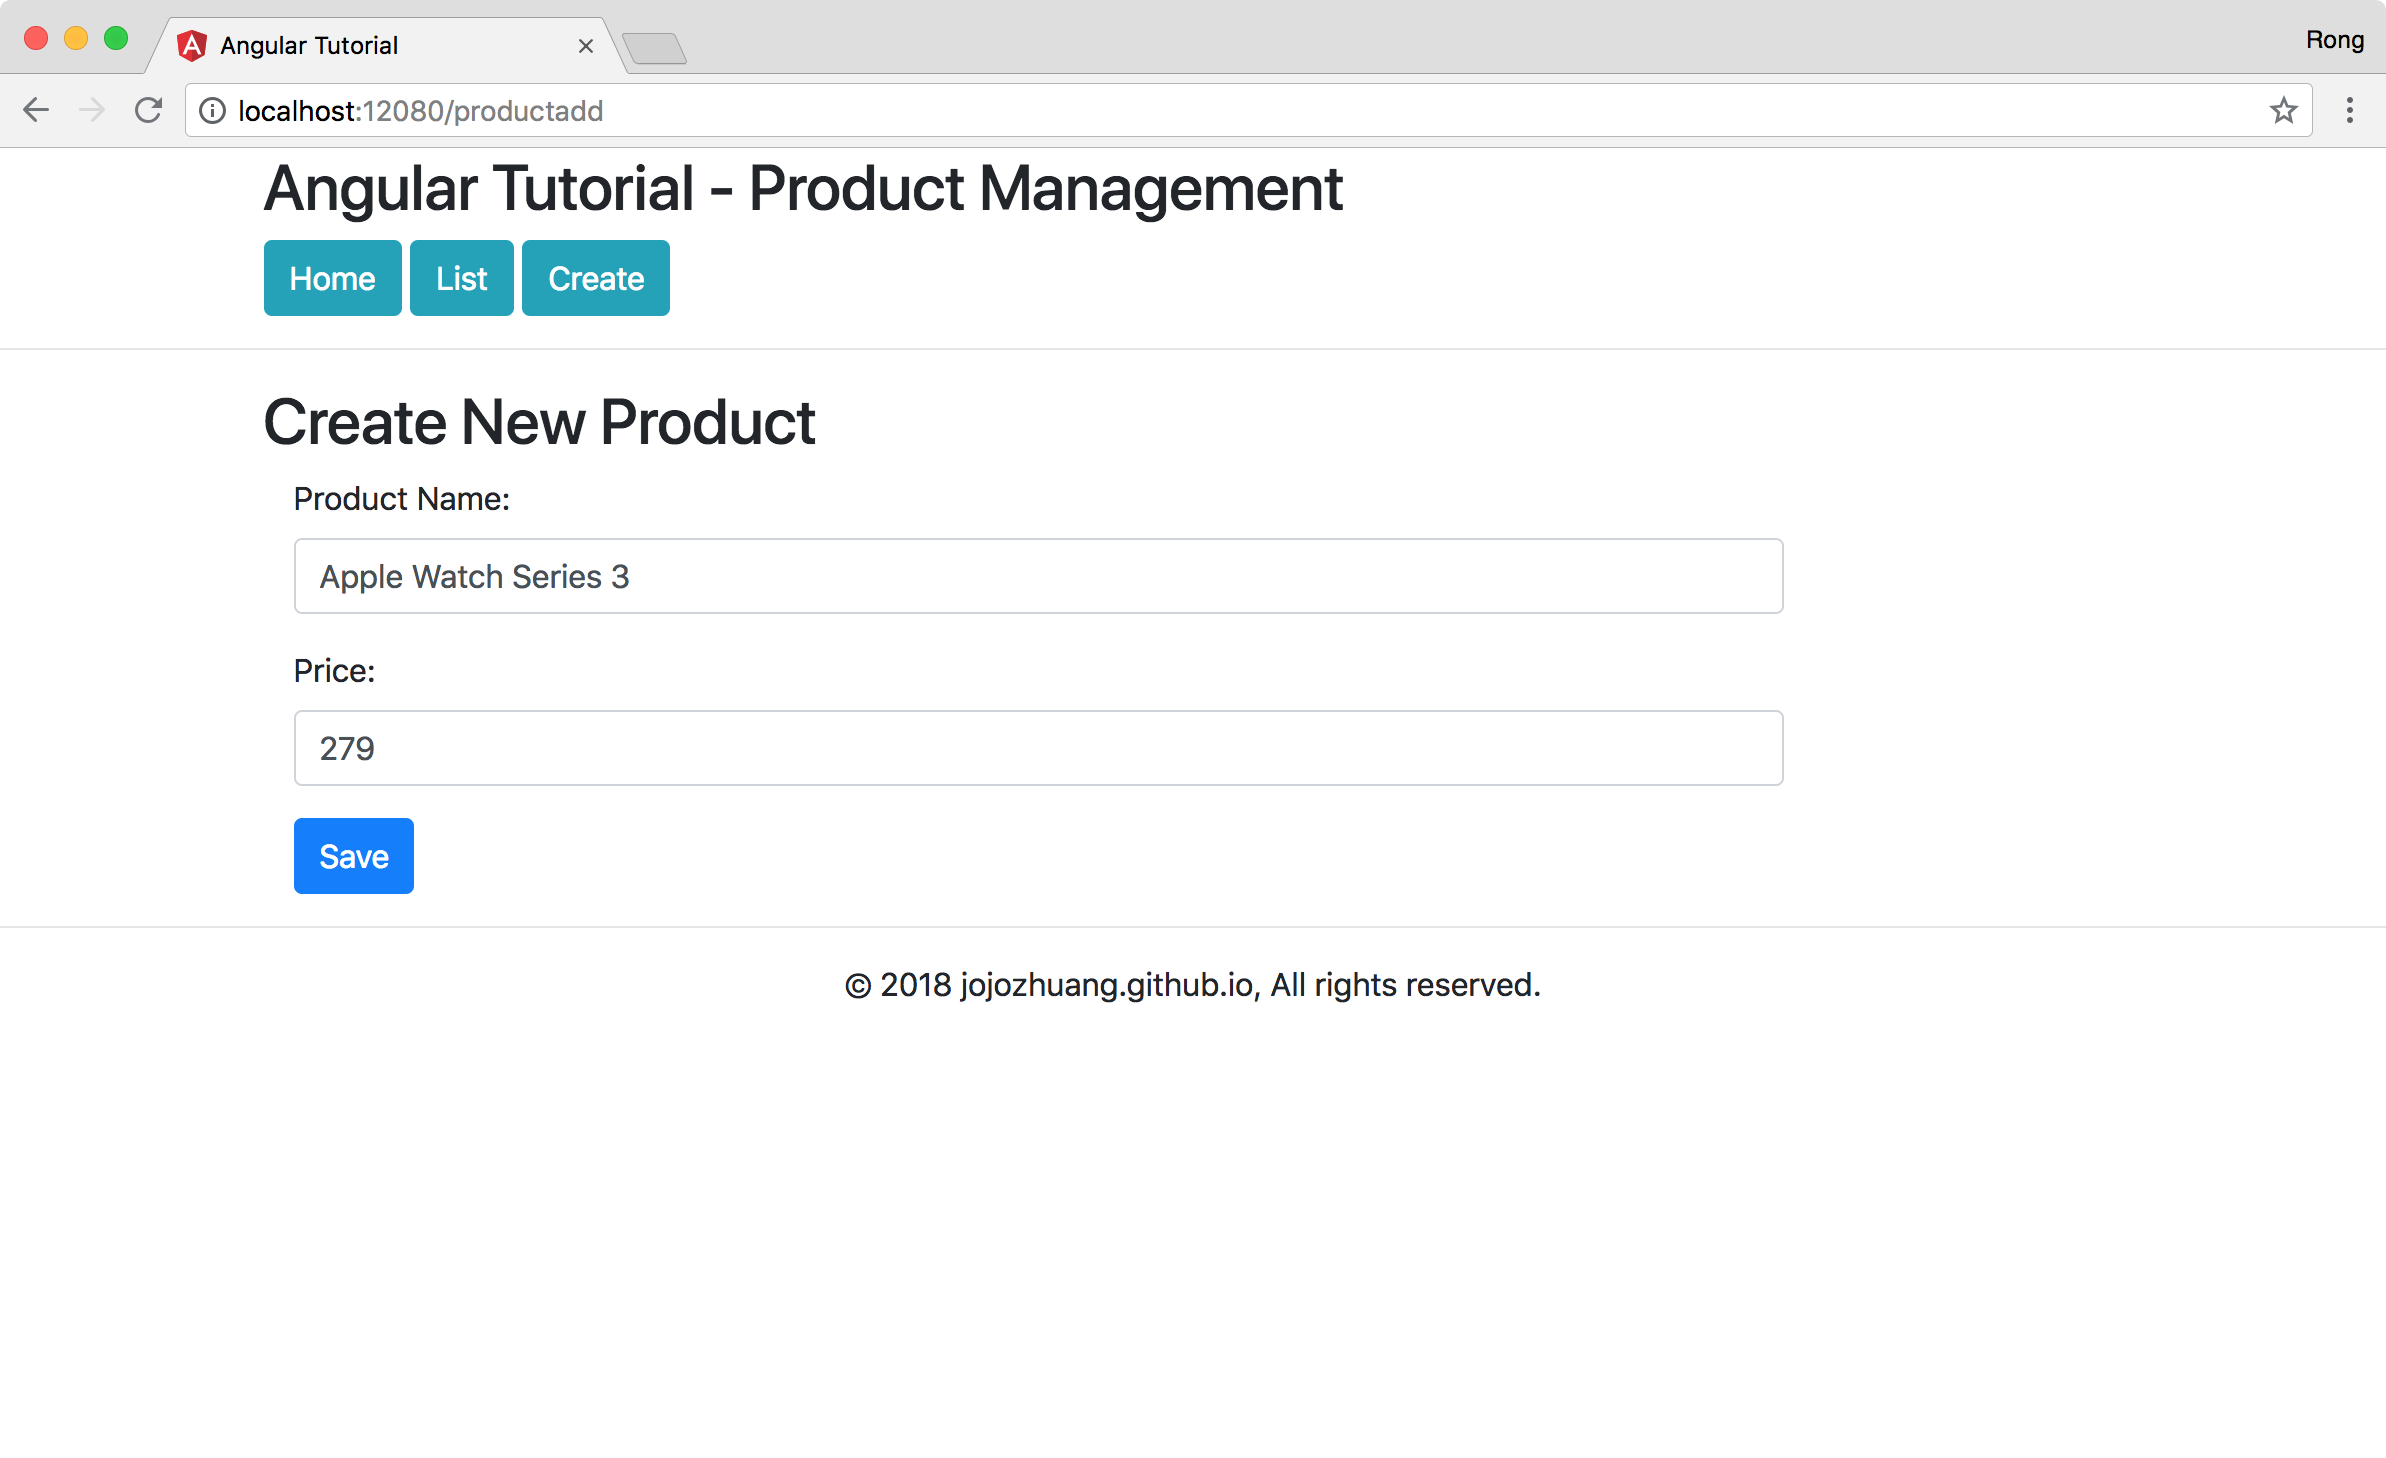 Click ‘Save’ button, product is saved.
 Click ‘Edit’ button of the new added product. Change the product name and price.
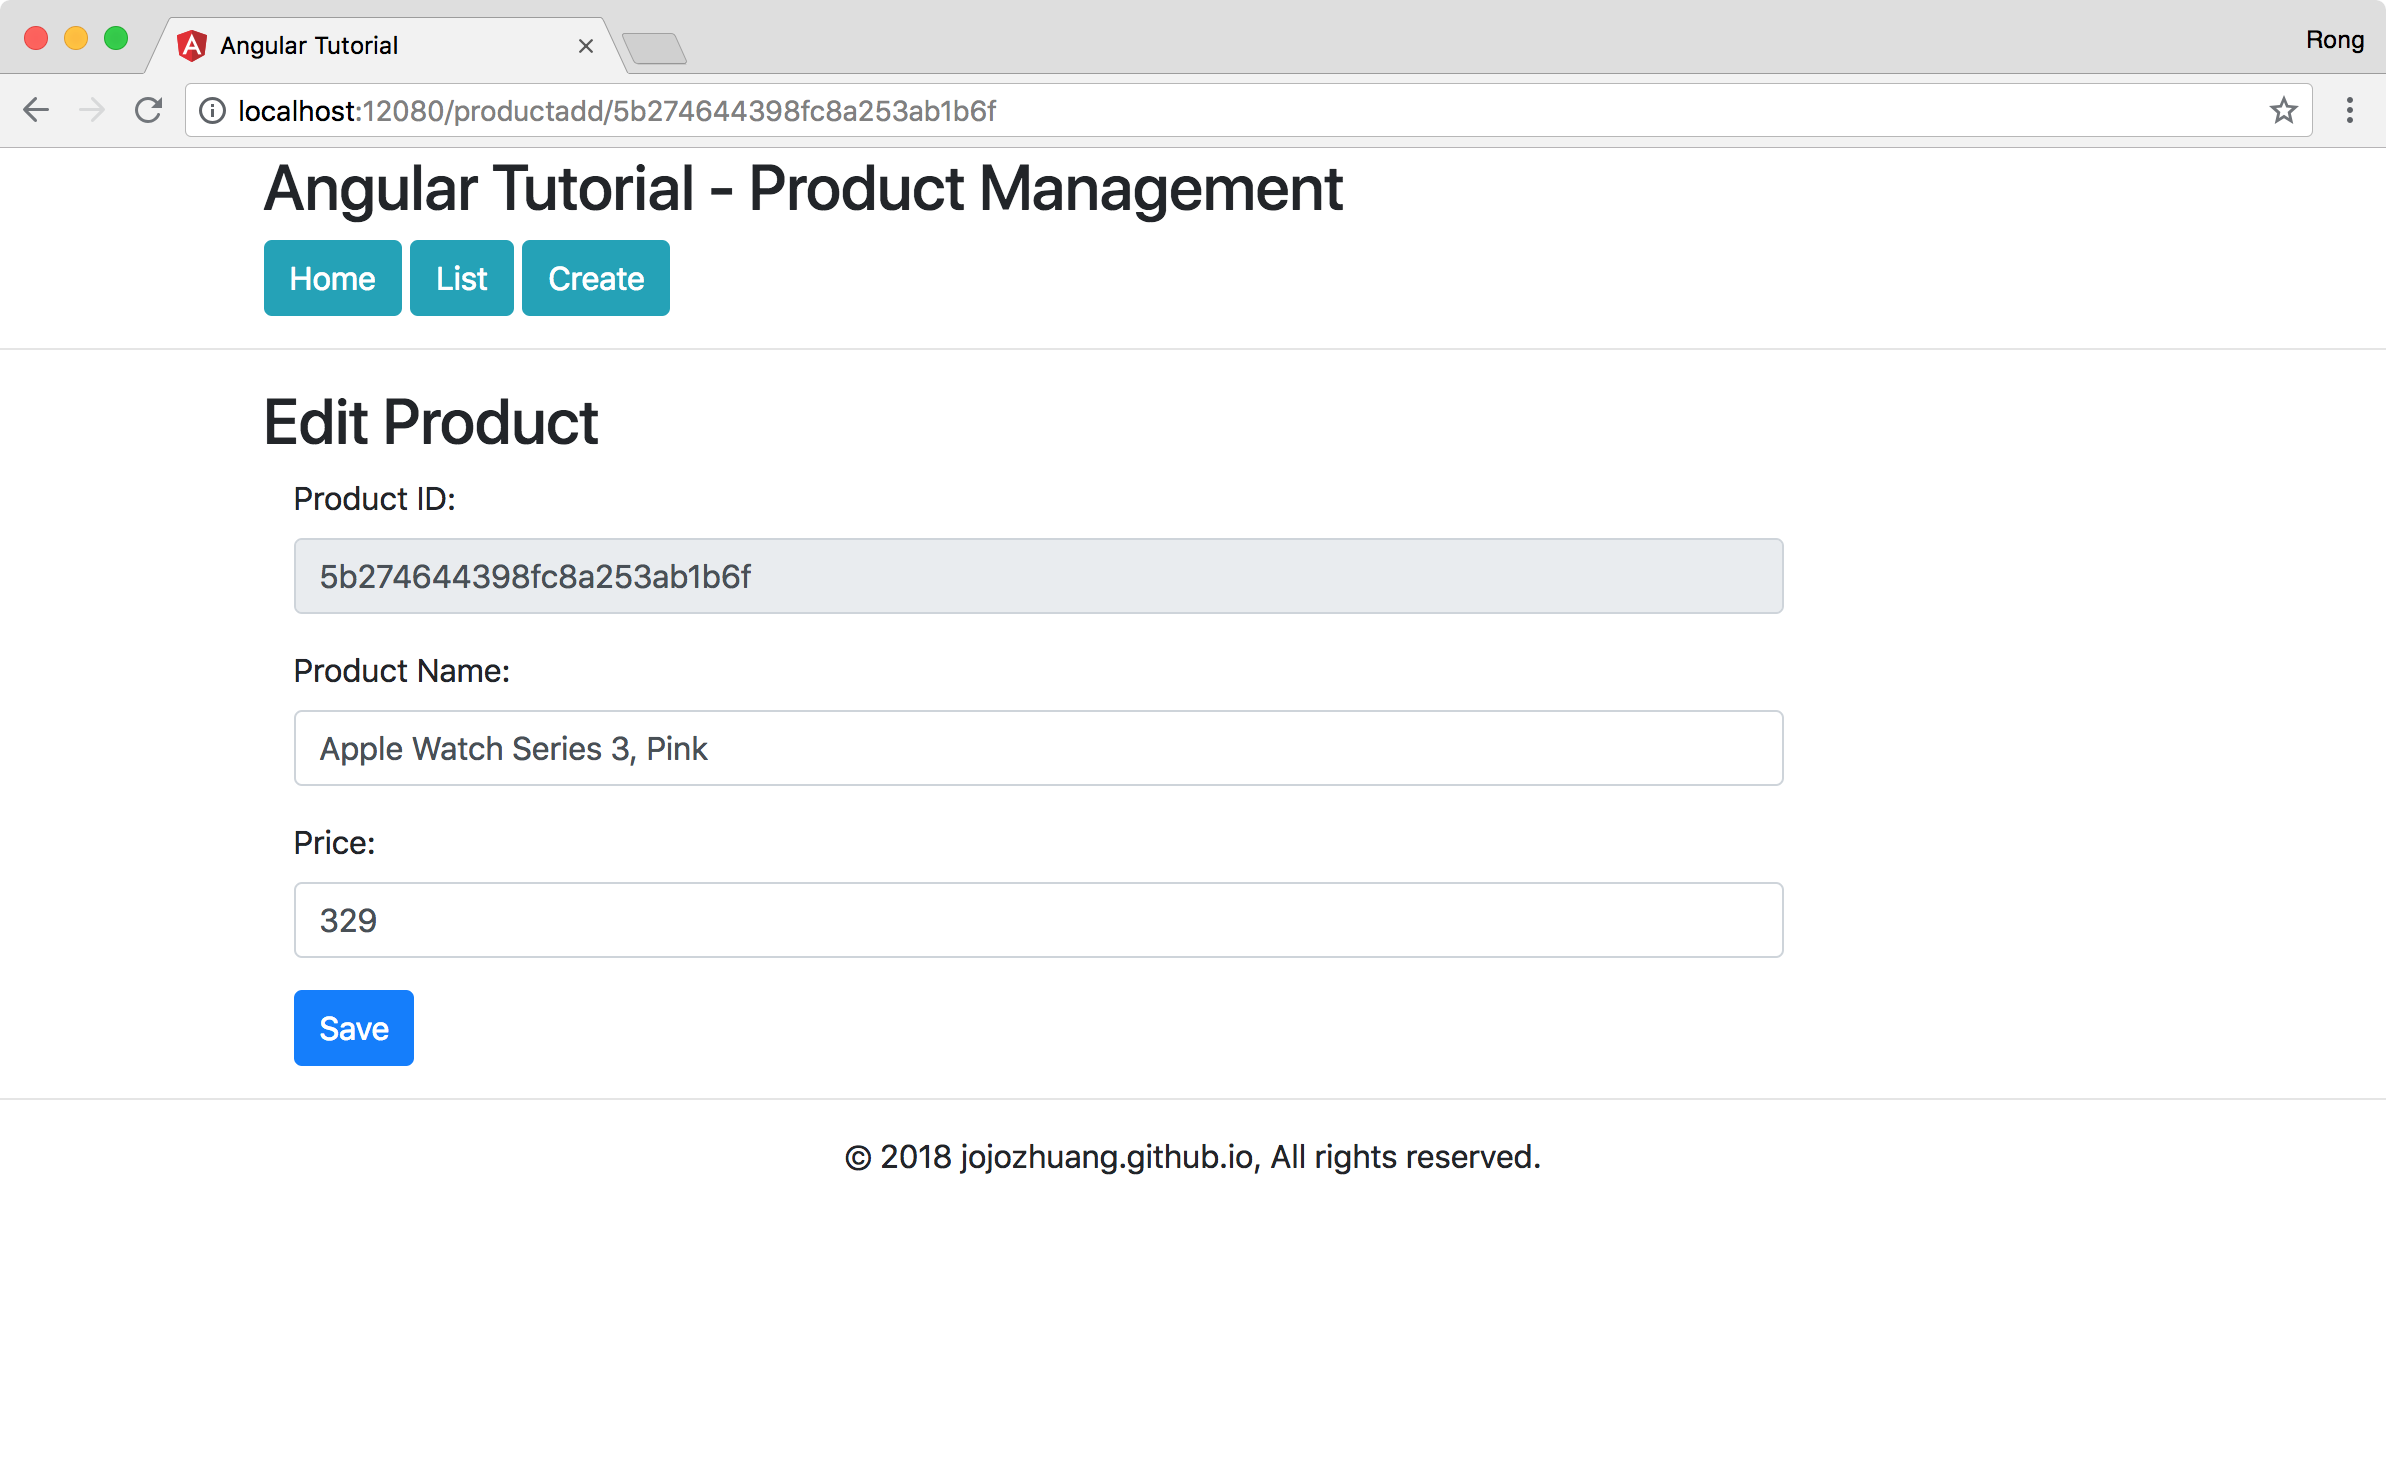 Click ‘Save’ button, the fourth product is updated.
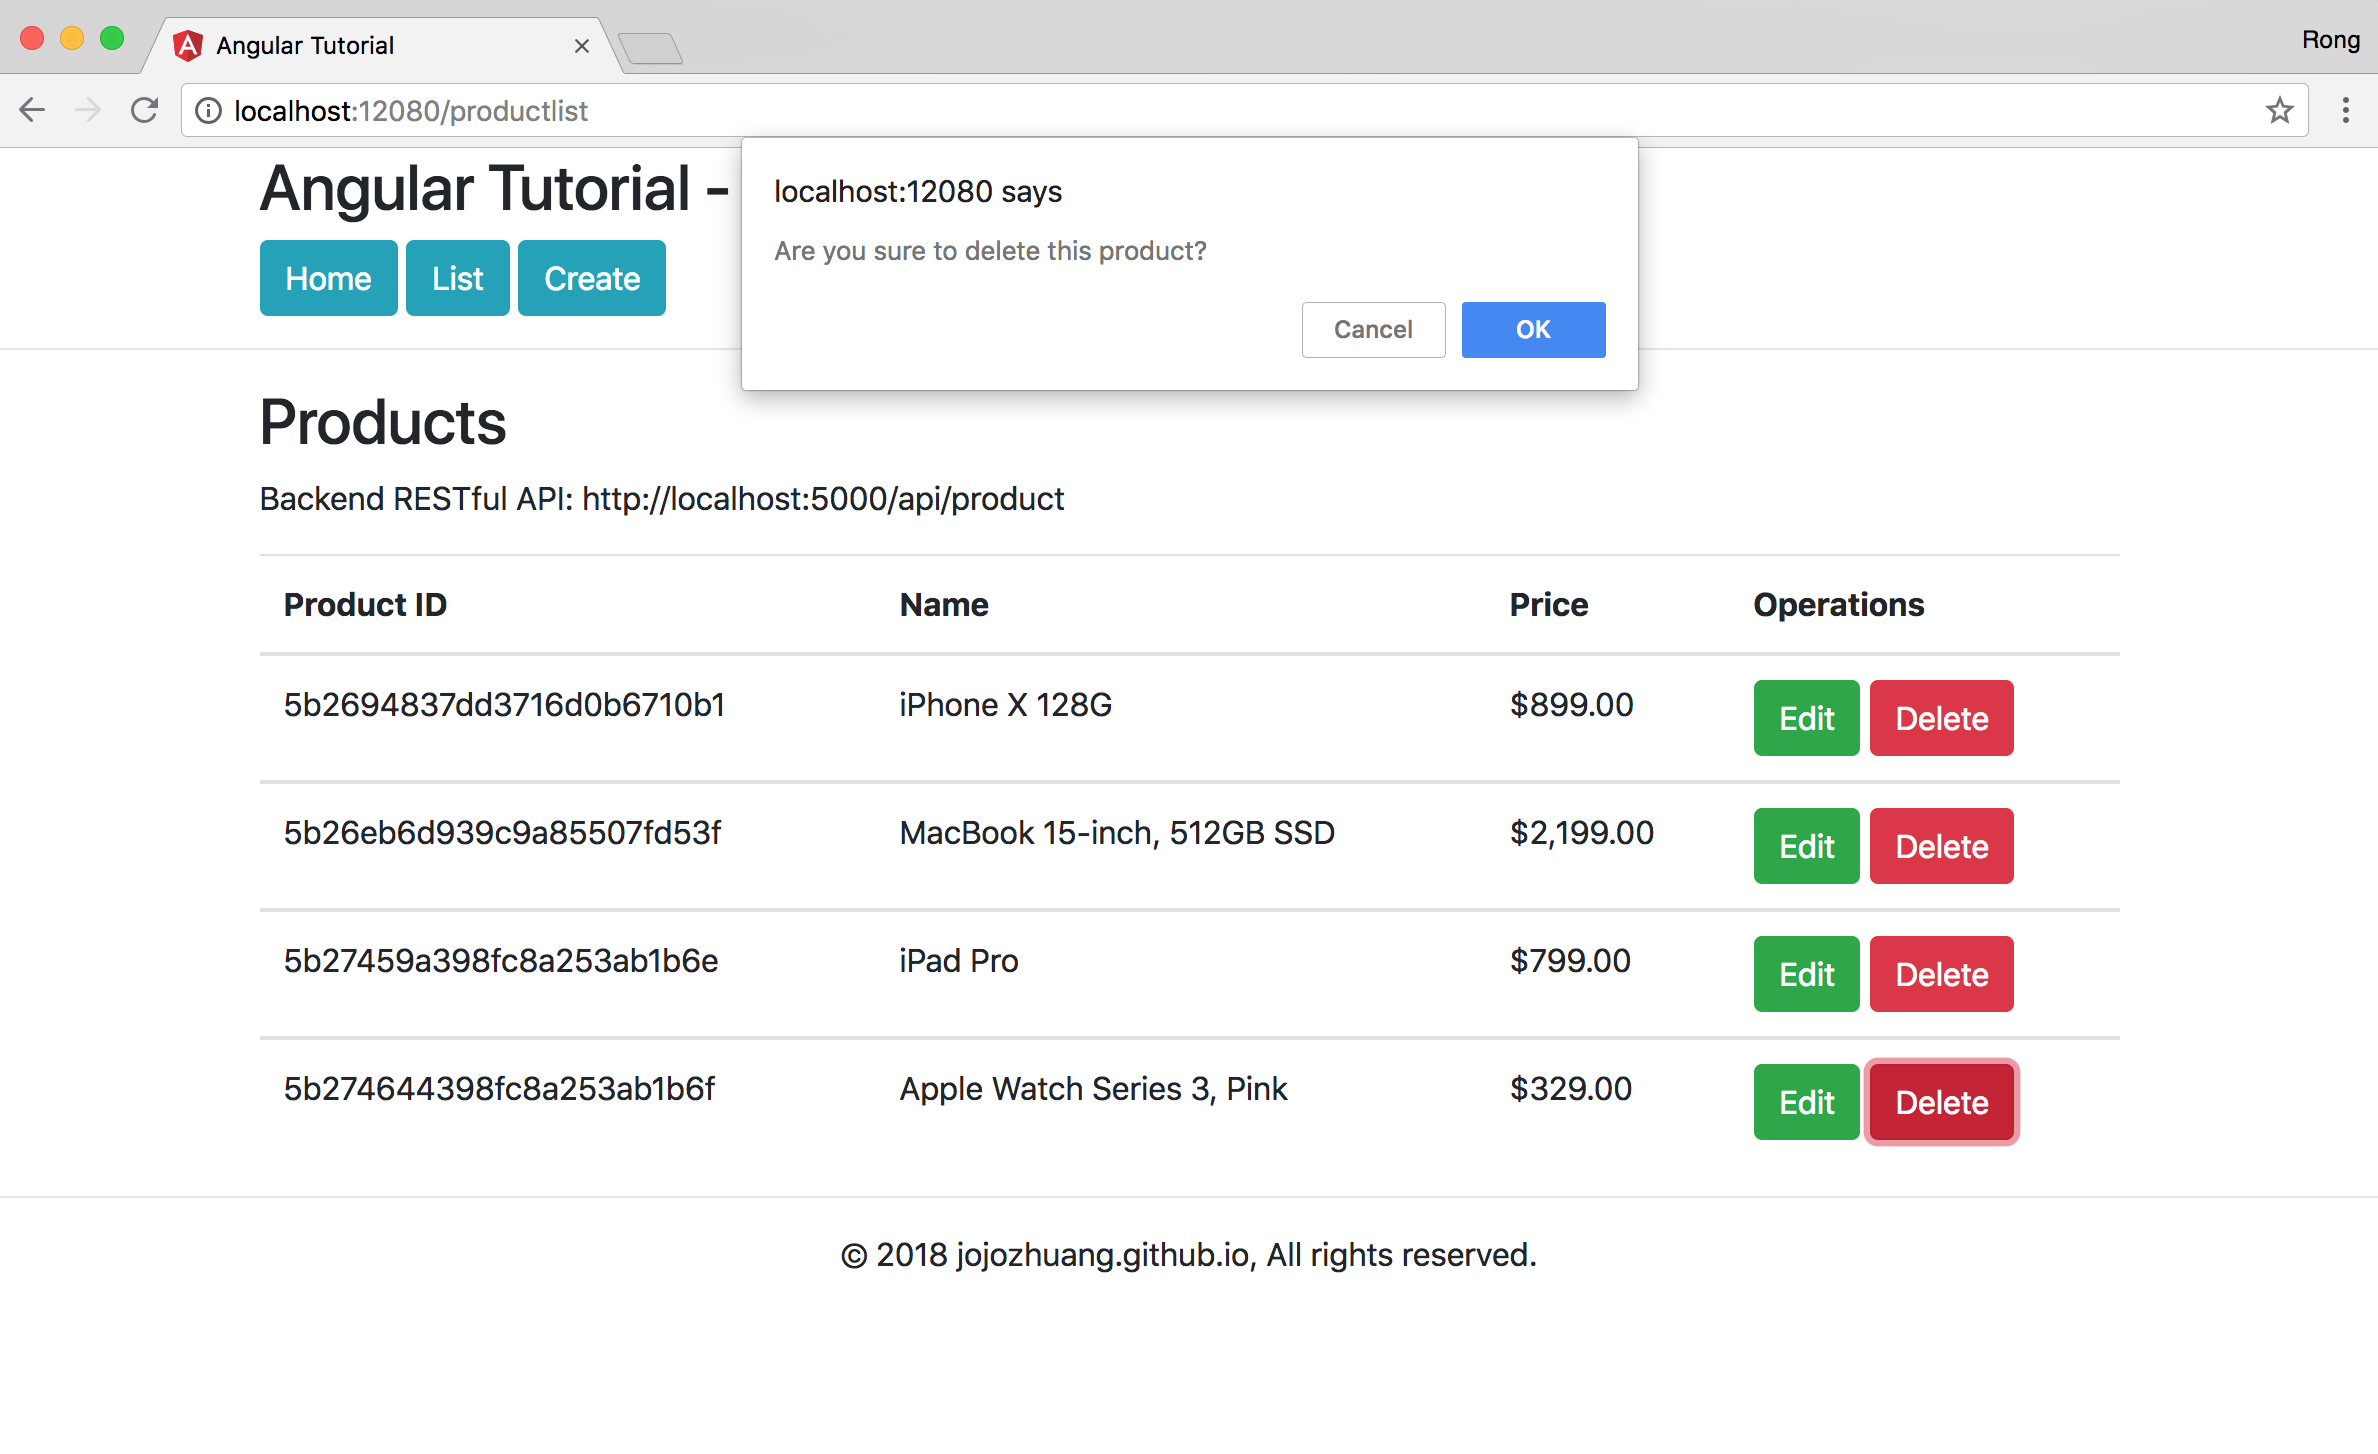
 Click ‘Delete’ button of the last product. A popup window for confirming the delete operation shows up.
 Click ‘OK’ button, product will be deleted.