8451. Building Web Application with ReactReact, ESLint, and Webpack
Build web application with ReactJS.
1. Game Store Web Application
In the posting Building Web Application with Angular, I introduced how to use Angular and RESTful web service to create a web application to manage products. In this tutorial, we will learn how to use React to build such web application with the same UI and functions.
2. React Project
ReactJS is a front-end library developed by Facebook. It is used for handling the view layer for web and mobile apps. ReactJS allows us to create reusable UI components. It uses the virtual DOM to track the state of the actual DOM, only re-rendering discrete sections of the DOM as changes to application state dictate.
2.1 Creating New Project
Create new Node.js app named game-store-react.
$ mkdir game-store-react
$ cd game-store-react
$ npm init
2.2 Installing Packages
Install ‘npm-run-all’ globally.
$ npm install npm-run-all -g
Open package.json, update it as follows.
{
  "name": "game-store-react",
  "version": "1.0.0",
  "description": "Game Store built with ReactJS",
  "main": "index.js",
  "scripts": {
    "start": "npm-run-all --parallel open:src lint:watch",
    "open:src": "babel-node tools/server.js",
    "lint": "node_modules/.bin/esw webpack.config.* src tools",
    "lint:watch": "npm run lint -- --watch",
    "test": "echo \"Error: no test specified\" && exit 1"
  },
  "keywords": [
    "react"
  ],
  "author": "johnny",
  "license": "ISC",
  "dependencies": {
    "babel-polyfill": "^6.26.0",
    "express": "^4.16.2",
    "react": "^16.2.0",
    "react-bootstrap": "^0.31.5",
    "react-dom": "^16.2.0",
    "react-router": "^4.2.0",
    "react-router-dom": "^4.2.2"
  },
  "devDependencies": {
    "babel-cli": "^6.26.0",
    "babel-loader": "^7.1.2",
    "babel-preset-es2015": "^6.24.1",
    "babel-preset-react": "^6.24.1",
    "babel-preset-react-hmre": "^1.1.1",
    "eslint": "^4.13.1",
    "eslint-plugin-import": "^2.8.0",
    "eslint-plugin-react": "^7.5.1",
    "eslint-watch": "^3.1.3",
    "eventsource-polyfill": "^0.9.6",
    "open": "0.0.5",
    "serve-favicon": "^2.4.5",
    "webpack": "^3.10.0",
    "webpack-dev-middleware": "^2.0.1",
    "webpack-hot-middleware": "^2.21.0"
  }
}
Then install packages defined in ‘package.json’ with the following command.
$ npm install
2.3 ES2015
Create file named .babelrc in project root folder to tell our app to use React and ES2015.
{
  "presets": ["react", "es2015"],
  "env": {
    "development": {
      "presets": ["react-hmre"]
    },
    "production": {
      "presets": ["react", "es2015"]
    }
  }
}
Thus, we can use ES6 Syntax. Previously, we use CommonJS syntax to include packages.
var Alert = require('react-bootstrap/lib/Alert');
// or
var Alert = require('react-bootstrap').Alert;
ES6 modules aren’t supported natively yet, but now you can use the syntax with the help of a transpiler like Babel.
import Button from 'react-bootstrap/lib/Button';
// or
import { Button } from 'react-bootstrap';
2.4 ESLint
ESLint is a pluggable and configurable linter tool for identifying and reporting on patterns in JavaScript. Create file named .eslintrc in project root folder to setup linting rules.
{
  "extends": [
    "eslint:recommended",
    "plugin:import/errors",
    "plugin:import/warnings"
  ],
  "plugins": [
    "react"
  ],
  "parserOptions": {
    "ecmaVersion": 6,
    "sourceType": "module",
    "ecmaFeatures": {
      "jsx": true
    }
  },
  "env": {
    "es6": true,
    "browser": true,
    "node": true,
    "jquery": true,
    "mocha": true
  },
  "rules": {
    "quotes": 0,
    "no-console": 1,
    "no-debugger": 1,
    "no-var": 1,
    "semi": [1, "always"],
    "no-trailing-spaces": 0,
    "eol-last": 0,
    "no-unused-vars": 0,
    "no-underscore-dangle": 0,
    "no-alert": 0,
    "no-lone-blocks": 0,
    "jsx-quotes": 1,
    "react/display-name": [ 1, {"ignoreTranspilerName": false }],
    "react/forbid-prop-types": [1, {"forbid": ["any"]}],
    "react/jsx-boolean-value": 1,
    "react/jsx-closing-bracket-location": 0,
    "react/jsx-curly-spacing": 1,
    "react/jsx-indent-props": 0,
    "react/jsx-key": 1,
    "react/jsx-max-props-per-line": 0,
    "react/jsx-no-bind": 1,
    "react/jsx-no-duplicate-props": 1,
    "react/jsx-no-literals": 0,
    "react/jsx-no-undef": 1,
    "react/jsx-pascal-case": 1,
    "react/jsx-sort-prop-types": 0,
    "react/jsx-sort-props": 0,
    "react/jsx-uses-react": 1,
    "react/jsx-uses-vars": 1,
    "react/no-danger": 1,
    "react/no-did-mount-set-state": 1,
    "react/no-did-update-set-state": 1,
    "react/no-direct-mutation-state": 1,
    "react/no-multi-comp": 1,
    "react/no-set-state": 0,
    "react/no-unknown-property": 1,
    "react/prefer-es6-class": 1,
    "react/prop-types": 1,
    "react/react-in-jsx-scope": 1,
    "react/require-extension": "off",
    "react/self-closing-comp": 1,
    "react/sort-comp": 1,
    "react/jsx-wrap-multilines": 1
  }
}
2.5 Webpack
Webpack is a module bundler. Its main purpose is to bundle JavaScript files for usage in a browser, yet it is also capable of transforming, bundling, or packaging just about any resource or asset. Create file named webpack.config.dev.js with following content.
import webpack from 'webpack';
import path from 'path';

export default {
  devtool: 'cheap-module-eval-source-map',
  entry: [
    'eventsource-polyfill', // necessary for hot reloading with IE
    'webpack-hot-middleware/client?reload=true', //note that it reloads the page if hot module reloading fails.
    './src/index'
  ],
  target: 'web',
  output: {
    path: __dirname + '/dist', // Note: Physical files are only output by the production build task `npm run build`.
    publicPath: '/',
    filename: 'bundle.js'
  },
  devServer: {
    contentBase: './src'
  },
  plugins: [
    new webpack.HotModuleReplacementPlugin(),
    new webpack.NoErrorsPlugin(),
    new webpack.DefinePlugin({
      'process.env': {
        'API_HOST': JSON.stringify('http://localhost:5000')
      }
    })
  ],
  module: {
    loaders: [
      {test: /\.js$/, include: path.join(__dirname, 'src'), exclude: /node_modules/, loaders: ['babel-loader']},
      {test: /(\.css)$/, loaders: ['style', 'css']},
      {test: /\.eot(\?v=\d+\.\d+\.\d+)?$/, loader: 'file'},
      {test: /\.(woff|woff2)$/, loader: 'url?prefix=font/&limit=5000'},
      {test: /\.ttf(\?v=\d+\.\d+\.\d+)?$/, loader: 'url?limit=10000&mimetype=application/octet-stream'},
      {test: /\.svg(\?v=\d+\.\d+\.\d+)?$/, loader: 'url?limit=10000&mimetype=image/svg+xml'}
    ]
  }
};
2.6 Server
Create file ‘tools/server.js’. Setup web server with express and serve our app at port 12090.
import express from 'express';
import webpack from 'webpack';
import path from 'path';
import config from '../webpack.config.dev';
import open from 'open';
import favicon from 'serve-favicon';

const port = 12090;
const app = express();
const compiler = webpack(config);

app.use(require('webpack-dev-middleware')(compiler, {
  publicPath: config.output.publicPath
}));

app.use(require('webpack-hot-middleware')(compiler));
app.use(favicon(path.join(__dirname,'../public','assets','favicon.ico')));

app.get('*', function(req, res) {
  res.sendFile(path.join( __dirname, '../src/index.html'));
});

app.listen(port, function(err) {
  if (err) {
  } else {
    open(`http://localhost:${port}`);
  }
});
2.7 Page
Create file ‘src/index.html’. This is the default page for this app.
<!DOCTYPE html>
<html lang="en">
  <head>
    <title>Game Store - React</title>
    <!-- Latest compiled and minified CSS -->
    <link rel="stylesheet" href="https://maxcdn.bootstrapcdn.com/bootstrap/latest/css/bootstrap.min.css">
  </head>
  <body>
    <div id="root"></div>
    <script src="/bundle.js"></script>
  </body>
</html>
Create file ‘src/index.js’.
import React from 'react';
import ReactDOM from 'react-dom';
import { BrowserRouter } from 'react-router-dom';
import App from './components/App';

ReactDOM.render((
  <BrowserRouter>
    <App />
  </BrowserRouter>
), document.getElementById('root'));
2.8 Main Components
Create file ‘src/components/App.js’. We define the App component here. It contains two child components, Header and Footer. In addition, we also define the Routes for this app, Home, ProductList and ProductPage.
import React from 'react';
import { Switch, Route } from 'react-router-dom';
import Header from './Header';
import Footer from './Footer';
import Home from './Home';
import ProductList from './product/ProductList';
import ProductPage from './product/ProductPage';

const App = () => (
  <div >
    <Header />
    <Switch>
      <Route exact path="/" component={Home}/>
      <Route path="/products" component={ProductList}/>
      <Route exact path="/productpage" component={ProductPage}/>
      <Route path="/productpage/:id" component={ProductPage}/>
    </Switch>
    <Footer />
  </div>
);

export default App;
Create file ‘src/components/Header.js’. We define three buttons with React-Bootstrap. href attribute contains the paths defined in Routes. When these buttons are clicked, web page will be navigated to corresponding components.
import React from 'react';
import { Button, ButtonToolbar} from 'react-bootstrap';

const Header = () => (
  <div>
    <div className="container">
      <h2>React Tutorial - Product Management</h2>
      <ButtonToolbar>
        <Button bsStyle="info" href="/">Home</Button>
        <Button bsStyle="info" href="/products">List</Button>
        <Button bsStyle="info" href="/productpage">Add</Button>
      </ButtonToolbar>
    </div>
    <hr/>
  </div>
);

export default Header;
Create file ‘src/components/Footer.js’.
import React from 'react';
const Footer = () => {
return (
<div>
<hr />
<footer className="container-fluid text-center">
<p>© 2017 jojozhuang.github.io, All rights reserved.</p>
</footer>
</div>
);
};
export default Footer;
Create file ‘src/components/Home.js’.
import React from 'react';

const Home = () => (
  <div className="jumbotron text-center">
    <h1>Game Store - Product Management</h1>
    <p>Built with React and Restful APIs(SpringBoot, Asp.Net Core)</p>
  </div>
);

export default Home;
2.9 Product List Component
Create file ‘src/components/product/ProductList.js’.
import React from 'react';
import PropTypes from 'prop-types';
import { Button, ButtonToolbar} from 'react-bootstrap';
import AlertSimple from '../controls/AlertSimple';
import productApi from '../../api/ProductsApi';

class ProductList extends React.Component {
  constructor(props) {
    super(props);
    this.state = {
      hasError: false,
      error: {},
      products: []
    };

    this.deleteRow = this.deleteRow.bind(this);
    this.handleError = this.handleError.bind(this);
  }

  componentDidMount() {
    return productApi.getAllProducts().then(products => {
      this.setState({products: products});
    }).catch(error => {
      this.handleError(error);
    });
  }

  deleteRow(event, id) {
    if(window.confirm('Are you sure to delete this product?')){
      let oldProduct = this.state.products.find(product => product.id == id);
      return productApi.deleteProduct(oldProduct).then(() => {
        const products = Object.assign([], this.state.products);
        const indexToDelete = this.state.products.findIndex(product => {return product.id == oldProduct.id;});
        products.splice(indexToDelete, 1);
        this.setState({products: products});
      }).catch(error => {
        this.handleError(error);
      });
    }
  }

  handleError(error) {
    this.setState({ hasError: true });
    this.setState({ error: error });
  }

  render() {
    let alert = '';
    if (this.state.hasError) {
      alert = (<AlertSimple error={this.state.error}/>);
    }
    return (
      <div className="container">
        <h2>Products</h2>
        <p>Data from Restful API</p>
        {alert}
        <table className="table">
          <thead>
            <tr>
              <th>Product ID</th>
              <th>Product Name</th>
              <th>Price</th>
              <th>Image</th>
              <th>Operations</th>
            </tr>
          </thead>
          <tbody>
          {
            this.state.products
              .sort((a, b) => a.id < b.id)
              .map(product => (
                <tr key={product.id}>
                  <td>{product.id}</td>
                  <td>{product.productName}</td>
                  <td>{product.price}</td>
                  <td><img src={product.image} className="img-thumbnail" width="80" height="80"/></td>
                  <td>
                    <ButtonToolbar>
                      <Button bsStyle="success" href={'/productpage/' + product.id} >Edit</Button>
                      <Button bsStyle="danger" onClick={(e) => this.deleteRow(e, product.id)}>Delete</Button>
                    </ButtonToolbar>
                  </td>
                </tr>)
              )
          }
          </tbody>
        </table>
      </div>
    );
  }
}

export default ProductList;
The following points need to be noted about the above code.
- In
componentDidMount()method, call productApi to get products. - Use
deleteRow(event, id)to delete product. - In
render()method, render a table to display all products. - For each product row, append
EditandDeletebuttons to allow user to edit and delete product.
2.10 Product Detail Components
We separate the detail page to three components, ProductPage, ProductForm and ImageUpload.
1) Create file ‘src/components/product/ProductPage.js’.
import React from 'react';
import PropTypes from 'prop-types';
import AlertSimple from '../controls/AlertSimple';
import ProductForm from './ProductForm';
import productApi from '../../api/ProductsApi';

class ProductPage extends React.Component {
  constructor(props) {
    super(props);
    this.state = {
      hasError: false,
      error: {},
      product: {id: '0', productName: '', price: '', image: process.env.API_HOST+"/images/default.png"},
      isnew: false
    };

    this.updateProductState = this.updateProductState.bind(this);
    this.handleImageChange = this.handleImageChange.bind(this);
    this.handleSave = this.handleSave.bind(this);
    this.handleError = this.handleError.bind(this);
  }

  componentDidMount() {
    const pId = this.props.match.params.id;
    const isnew = pId == null;
    this.setState({isnew: isnew});

    if (pId) {
      productApi.getProduct(pId).then(product => {
        this.setState({product: product});
      }).catch(error => {
        this.handleError(error);
      });
    }
  }

  updateProductState(event) {
    const field = event.target.name;
    const product = this.state.product;
    product[field] = event.target.value;
    return this.setState({product: product});
  }

  handleImageChange(image) {
    // clear error
    this.setState({ hasError: false });
    this.setState({ error: null });
    // update product to inform child component
    const product = this.state.product;
    product['image'] = image;
    return this.setState({product: this.state.product});
  }

  handleSave(event) {
    event.preventDefault();
    let product = this.state.product;
    if (this.state.isnew) {
      productApi.createProduct(product).then(response => {
        this.props.history.push('/products');
      }).catch(error => {
        this.handleError(error);
      });
    } else {
      productApi.updateProduct(product).then(response => {
        this.props.history.push('/products');
      }).catch(error => {
        this.handleError(error);
      });
    }
  }

  handleError(error) {
    this.setState({ error: error });
    this.setState({ hasError: true });
  }

  render() {
    let alert = '';
    if (this.state.hasError) {
      alert = <AlertSimple error={this.state.error}/>;
    }
    let pageTitle = 'Edit Product';
    if (this.state.isnew) {
      pageTitle = 'Create New Product';
    }
    return(
      <div className="container">
        <h2>{pageTitle}</h2>
        {alert}
        <ProductForm
          product={this.state.product}
          isnew={this.state.isnew}
          onChange={this.updateProductState}
          onImageChange={this.handleImageChange}
          onSave={this.handleSave}
          onError={this.handleError}/>
      </div>
    );
  }
}

ProductPage.propTypes = {
  match: PropTypes.object.isRequired,
  history: PropTypes.object.isRequired
};

export default ProductPage;
The following points need to be noted about the above code.
- In
componentDidMount()method, call productApi to get product by id. - In
render()method, render componentAlertSimpleandProductForm. Pass state and function from ProductPage to ProductForm. - Use
updateProductState(event)to handle the value(product name, price, etc) change from ProductForm. - Use
handleImageChange(image)to update image of product if new image is uploaded. - In
handleSave(event)method, call productApi to create or update product. Usehistory.push('/products')to navigate to product list page once product is saved. - Use
PropTypesfor type checking.
2) Create file ‘src/components/product/ProductForm.js’.
import React from 'react';
import PropTypes from 'prop-types';
import { Form, FormGroup, Col, ControlLabel, FormControl, Button} from 'react-bootstrap';
import ImageUpload from './ImageUpload';

class ProductForm extends React.Component {
  constructor(props) {
    super(props);
  }

  render() {
    let productIdControl = null;
    if (this.props.isnew) {
      productIdControl = '';
    } else {
      productIdControl = (
        <FormGroup controlId="id">
          <Col componentClass={ControlLabel} sm={2}>Product ID:</Col>
          <Col sm={10}><FormControl name="id" type="text" value={this.props.product.id +""} disabled onChange={this.props.onChange}/></Col>
        </FormGroup>
      );
    }
    return(
      <Form horizontal>
        {productIdControl}
        <FormGroup controlId="productName">
          <Col componentClass={ControlLabel} sm={2}>Product Name:</Col>
          <Col sm={10}><FormControl name="productName" type="text" placeholder="Enter product name" value={this.props.product.productName +""} onChange={this.props.onChange}/></Col>
        </FormGroup>
        <FormGroup controlId="price">
          <Col componentClass={ControlLabel} sm={2}>Price:</Col>
          <Col sm={10}><FormControl name="price" type="text" placeholder="Enter price" value={this.props.product.price +""} onChange={this.props.onChange}/></Col>
        </FormGroup>
        <FormGroup>
          <Col componentClass={ControlLabel} sm={2}>Image:</Col>
          <Col sm={10}><ImageUpload image={this.props.product.image} onImageChange={this.props.onImageChange} onError={this.props.onError} /></Col>
        </FormGroup>
        <FormGroup>
          <Col smOffset={2} sm={10}>
            <Button bsStyle="primary" type="button" onClick={this.props.onSave}>Save</Button>
          </Col>
        </FormGroup>
      </Form>
    );
  }
}

ProductForm.propTypes = {
  product: PropTypes.object.isRequired,
  isnew: PropTypes.bool.isRequired,
  onChange: PropTypes.func.isRequired,
  onImageChange: PropTypes.func.isRequired,
  onSave: PropTypes.func.isRequired,
  onError: PropTypes.func.isRequired
};

export default ProductForm;
The following points need to be noted about the above code.
- This component has no its own state. It accepts
productprops from parent component ProductPage. - In
render()method, we use controls fromreact-bootstrapto render the form, includingImageUploadcomponent. - Use
PropTypesfor type checking.
3) Create file ‘src/components/product/ImageUpload.js’.
import React from 'react';
import PropTypes from 'prop-types';
import { FormGroup, Col, ControlLabel, FormControl, Button, Image, Label} from 'react-bootstrap';
import fileApi from '../../api/FileApi';
class ImageUpload extends React.Component {
constructor(props) {
super(props);
this.state = {
filename: "",
file: null
};
this.handleFileChange = this.handleFileChange.bind(this);
this.handleFileUpload = this.handleFileUpload.bind(this);
}
handleFileChange(event) {
const file = event.target.files[0];
this.setState({filename: file.name});
this.setState({file: file});
}
handleFileUpload(event) {
fileApi.uploadFile(this.state.file).then(response => {
this.props.onImageChange(response.message);
}).catch(error => {
this.props.onError(error);
});
}
render() {
return(
<div>
<Image src={this.props.image} thumbnail width="80" height="80" />
<ControlLabel className="btn btn-success" htmlFor="fileSelector">
<FormControl id="fileSelector" type="file" style="display: none" onChange={this.handleFileChange}/>Choose Image
</ControlLabel>
<Label bsStyle="info">{this.state.filename}</Label>
<Button bsStyle="primary" type="button" onClick={this.handleFileUpload}>Upload</Button>
</div>
);
}
}
ImageUpload.propTypes = {
image: PropTypes.string.isRequired,
onImageChange: PropTypes.func.isRequired,
onError: PropTypes.func.isRequired
};
export default ImageUpload;
The following points need to be noted about the above code.
- In
render()method, we use controls fromreact-bootstrapto render the form. - Use
handleFileChange(event)method to update file name if user select one image which is ready for uploading. - In
handleFileUpload(event)method, call fileApi to upload image file to server, and notify parent component after image is uploaded. - Use
PropTypesfor type checking.
2.10 Control Components
Create file ‘src/components/controls/AlertSimple.js’.
import React from 'react';
import PropTypes from 'prop-types';
import { Alert } from 'react-bootstrap';

const AlertSimple = ({error}) => {
  return (
    <Alert bsStyle="warning">
      {error.toString()}
    </Alert>
  );
};

AlertSimple.propTypes = {
  error: PropTypes.object.isRequired
};

export default AlertSimple;
3. APIs
3.1 Http Request
Create file ‘src/api/HttpHelper.js’. HttpHelper is the wrapper class for fetch.
class HttpHelper {
  static fetch(url, method, headers, body) {
    let options = Object.assign({'method': method});
    if (headers) {
      options = Object.assign(options, {'headers': headers});
    }
    if (body && method != 'GET') {
      options = Object.assign(options, {'body': body});
    }
    const request =  new Request(url, options);
    return fetch(request).then(response => {
      if (response.status >= 200 && response.status < 300) {
        return response.json();
      } else {
        const error = new Error(response.statusText + "(" + response.status + "), URL: " + response.url);
        return Promise.reject(error);
      }
    }).catch(error => {
      throw(error);
    });
  }
}

export default HttpHelper;
The following points need to be noted about the above code.
- Method
fetch()sends out http request to the given url. - If the response status is between 200 and 300, we assume proper response is returned. Otherwise, we returns the details of the error.
3.2 Product API
Create file ‘src/api/ProductsApi.js’.
import HttpHelper from './HttpHelper';

class ProductsApi {
  static requestHeaders() {
    return {'Content-Type': 'application/json'};
  }

  static getAllProducts() {
    return HttpHelper.fetch(`${process.env.API_HOST}/api/products/`, 'GET', this.requestHeaders(), null);
  }

  static getProduct(id) {
    return HttpHelper.fetch(`${process.env.API_HOST}/api/products/${id}`, 'GET', this.requestHeaders(), null);
  }

  static createProduct(product) {
    return HttpHelper.fetch(`${process.env.API_HOST}/api/products/`, 'POST', this.requestHeaders(), JSON.stringify(product));
  }

  static updateProduct(product) {
    return HttpHelper.fetch(`${process.env.API_HOST}/api/products/${product.id}`, 'PUT', this.requestHeaders(), JSON.stringify(product));
  }

  static deleteProduct(product) {
    return HttpHelper.fetch(`${process.env.API_HOST}/api/products/${product.id}`, 'DELETE', this.requestHeaders(), null);
  }
}

export default ProductsApi;
The following points need to be noted about the above code.
- Use
process.env.API_HOSTto get the base url of RESTful service. - Use HttpHelper to send http requests.
- Define 5 CRUD methods(GetAll, GetOne, Create, Update and Delete).
3.3 File API
Create file ‘src/api/FileApi.js’.
import HttpHelper from './HttpHelper';

class FileApi {
  static uploadFile(file) {
    const formData = new FormData();
    formData.append('file',file);
    return HttpHelper.fetch(`${process.env.API_HOST}/api/upload`, 'POST', null, formData);
  }
}

export default FileApi;
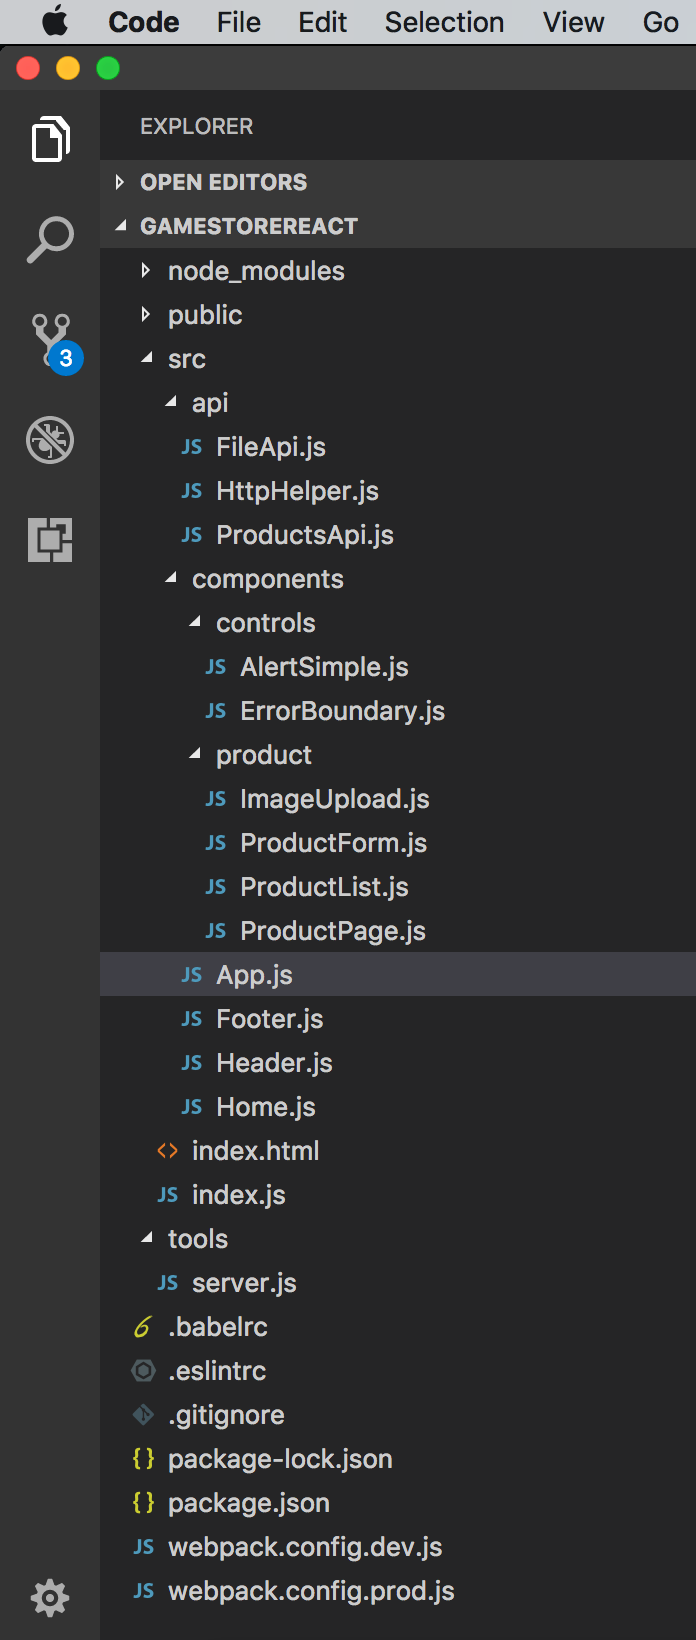
3.4 Final Project Structure
4. Running and Testing
Start the RESTful service first, and start this React app, serve it in web server.
$ npm start
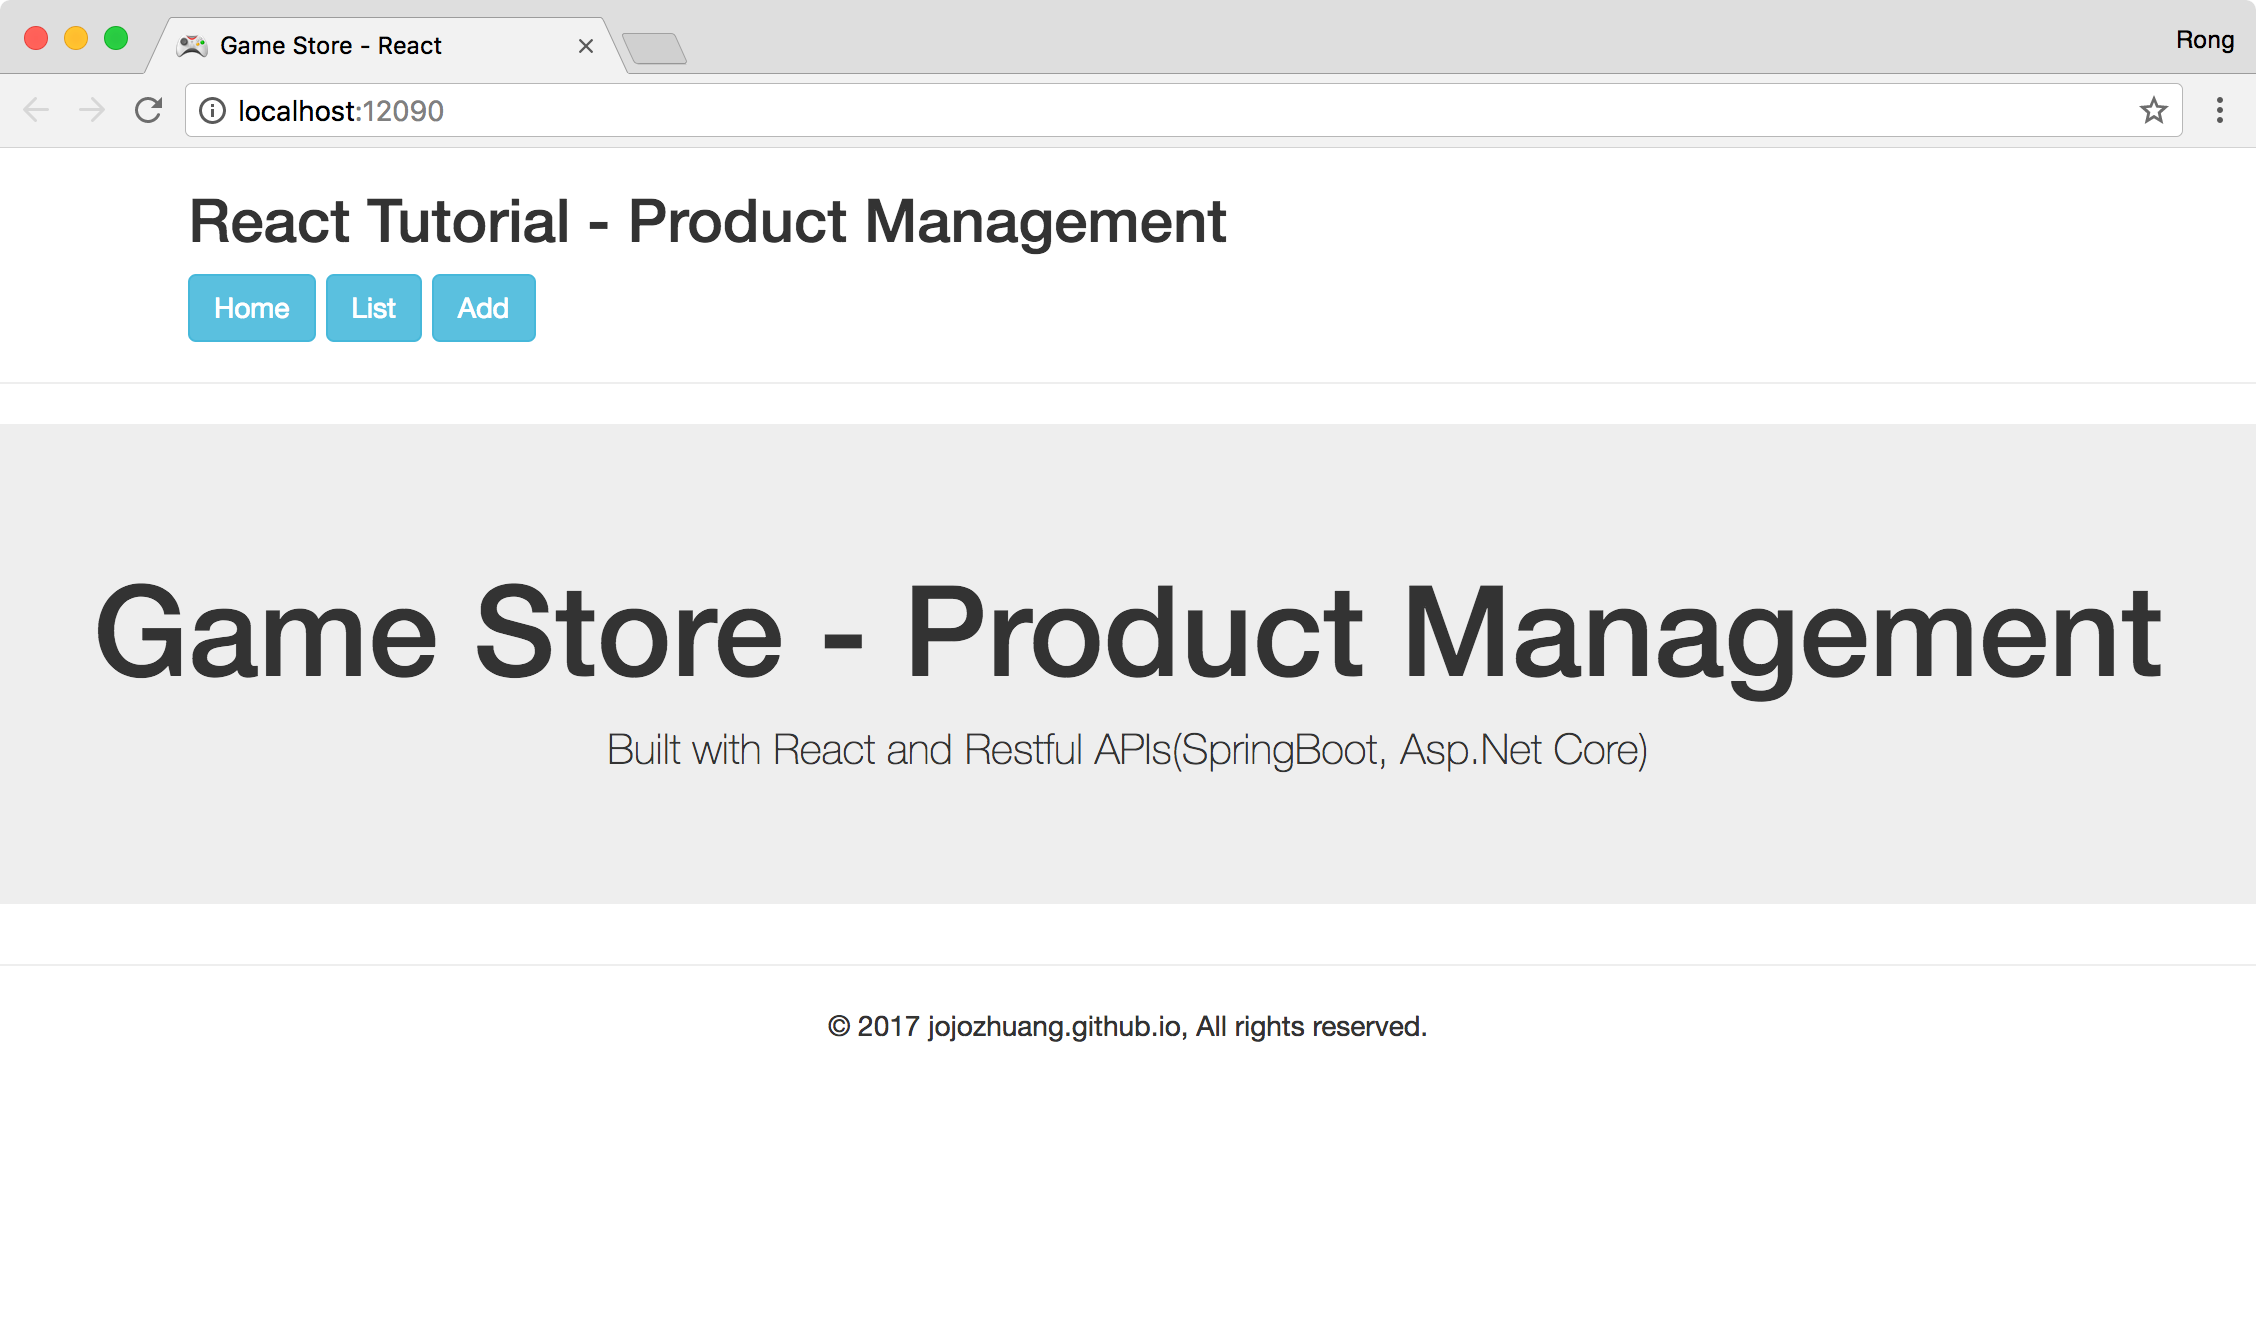
Open web browser, access ‘http://localhost:12090/’.
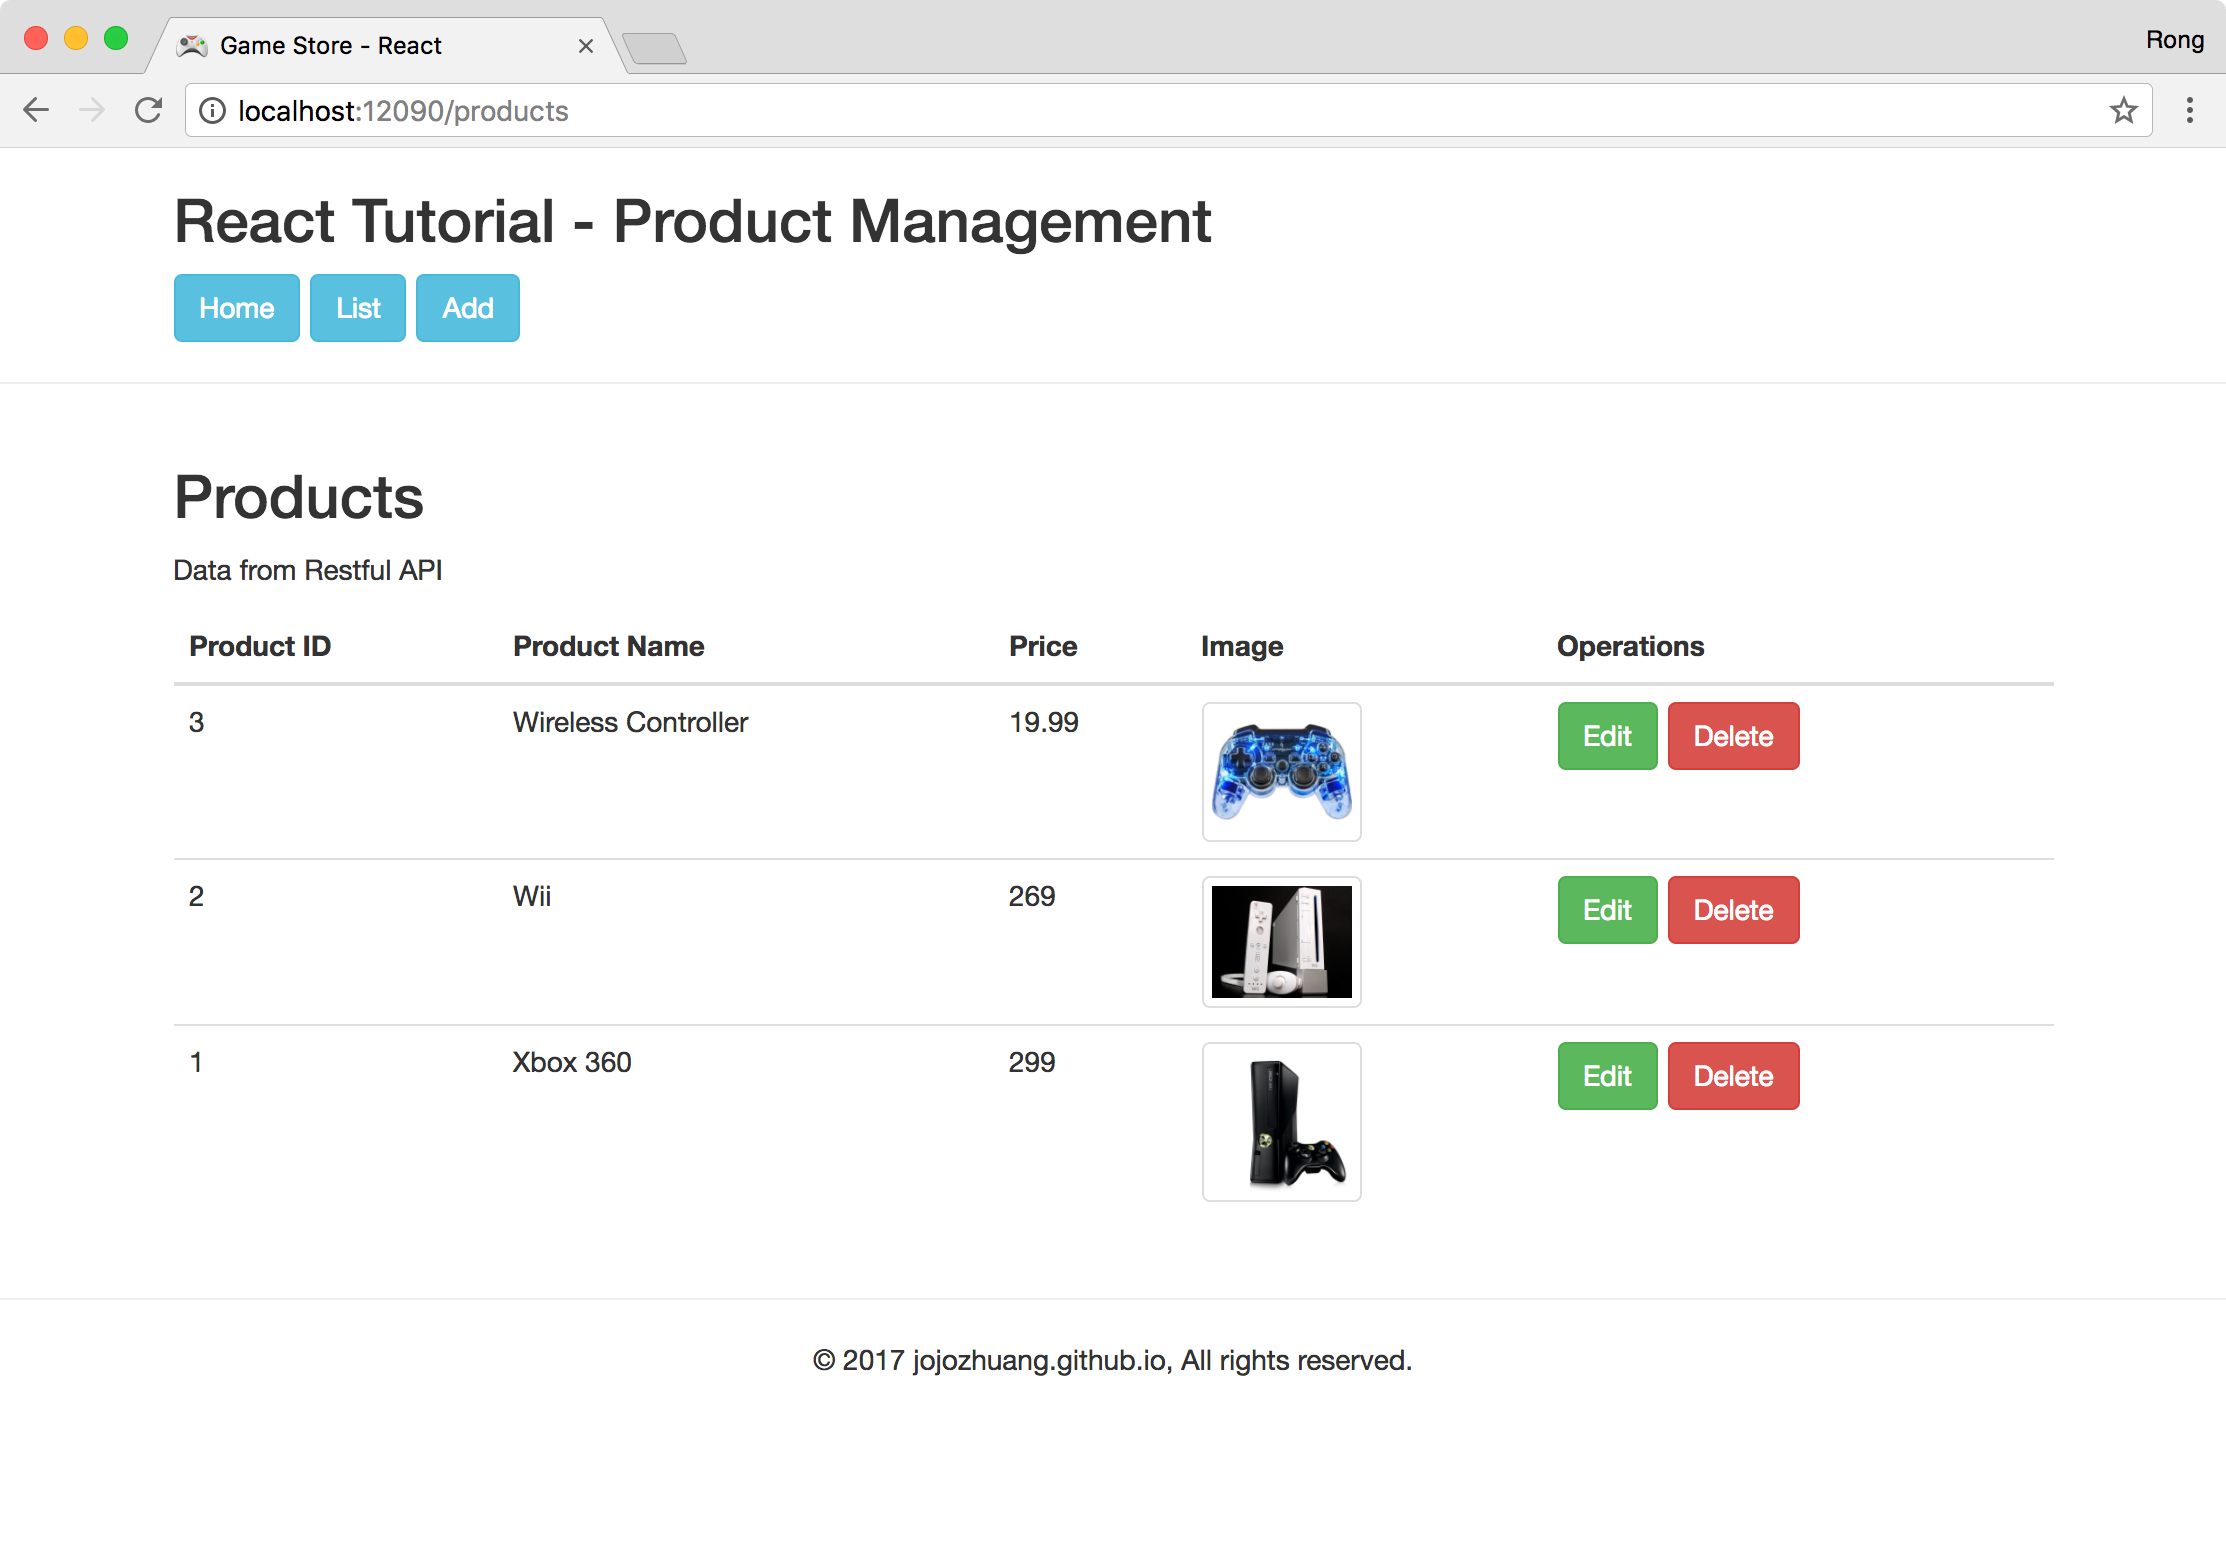
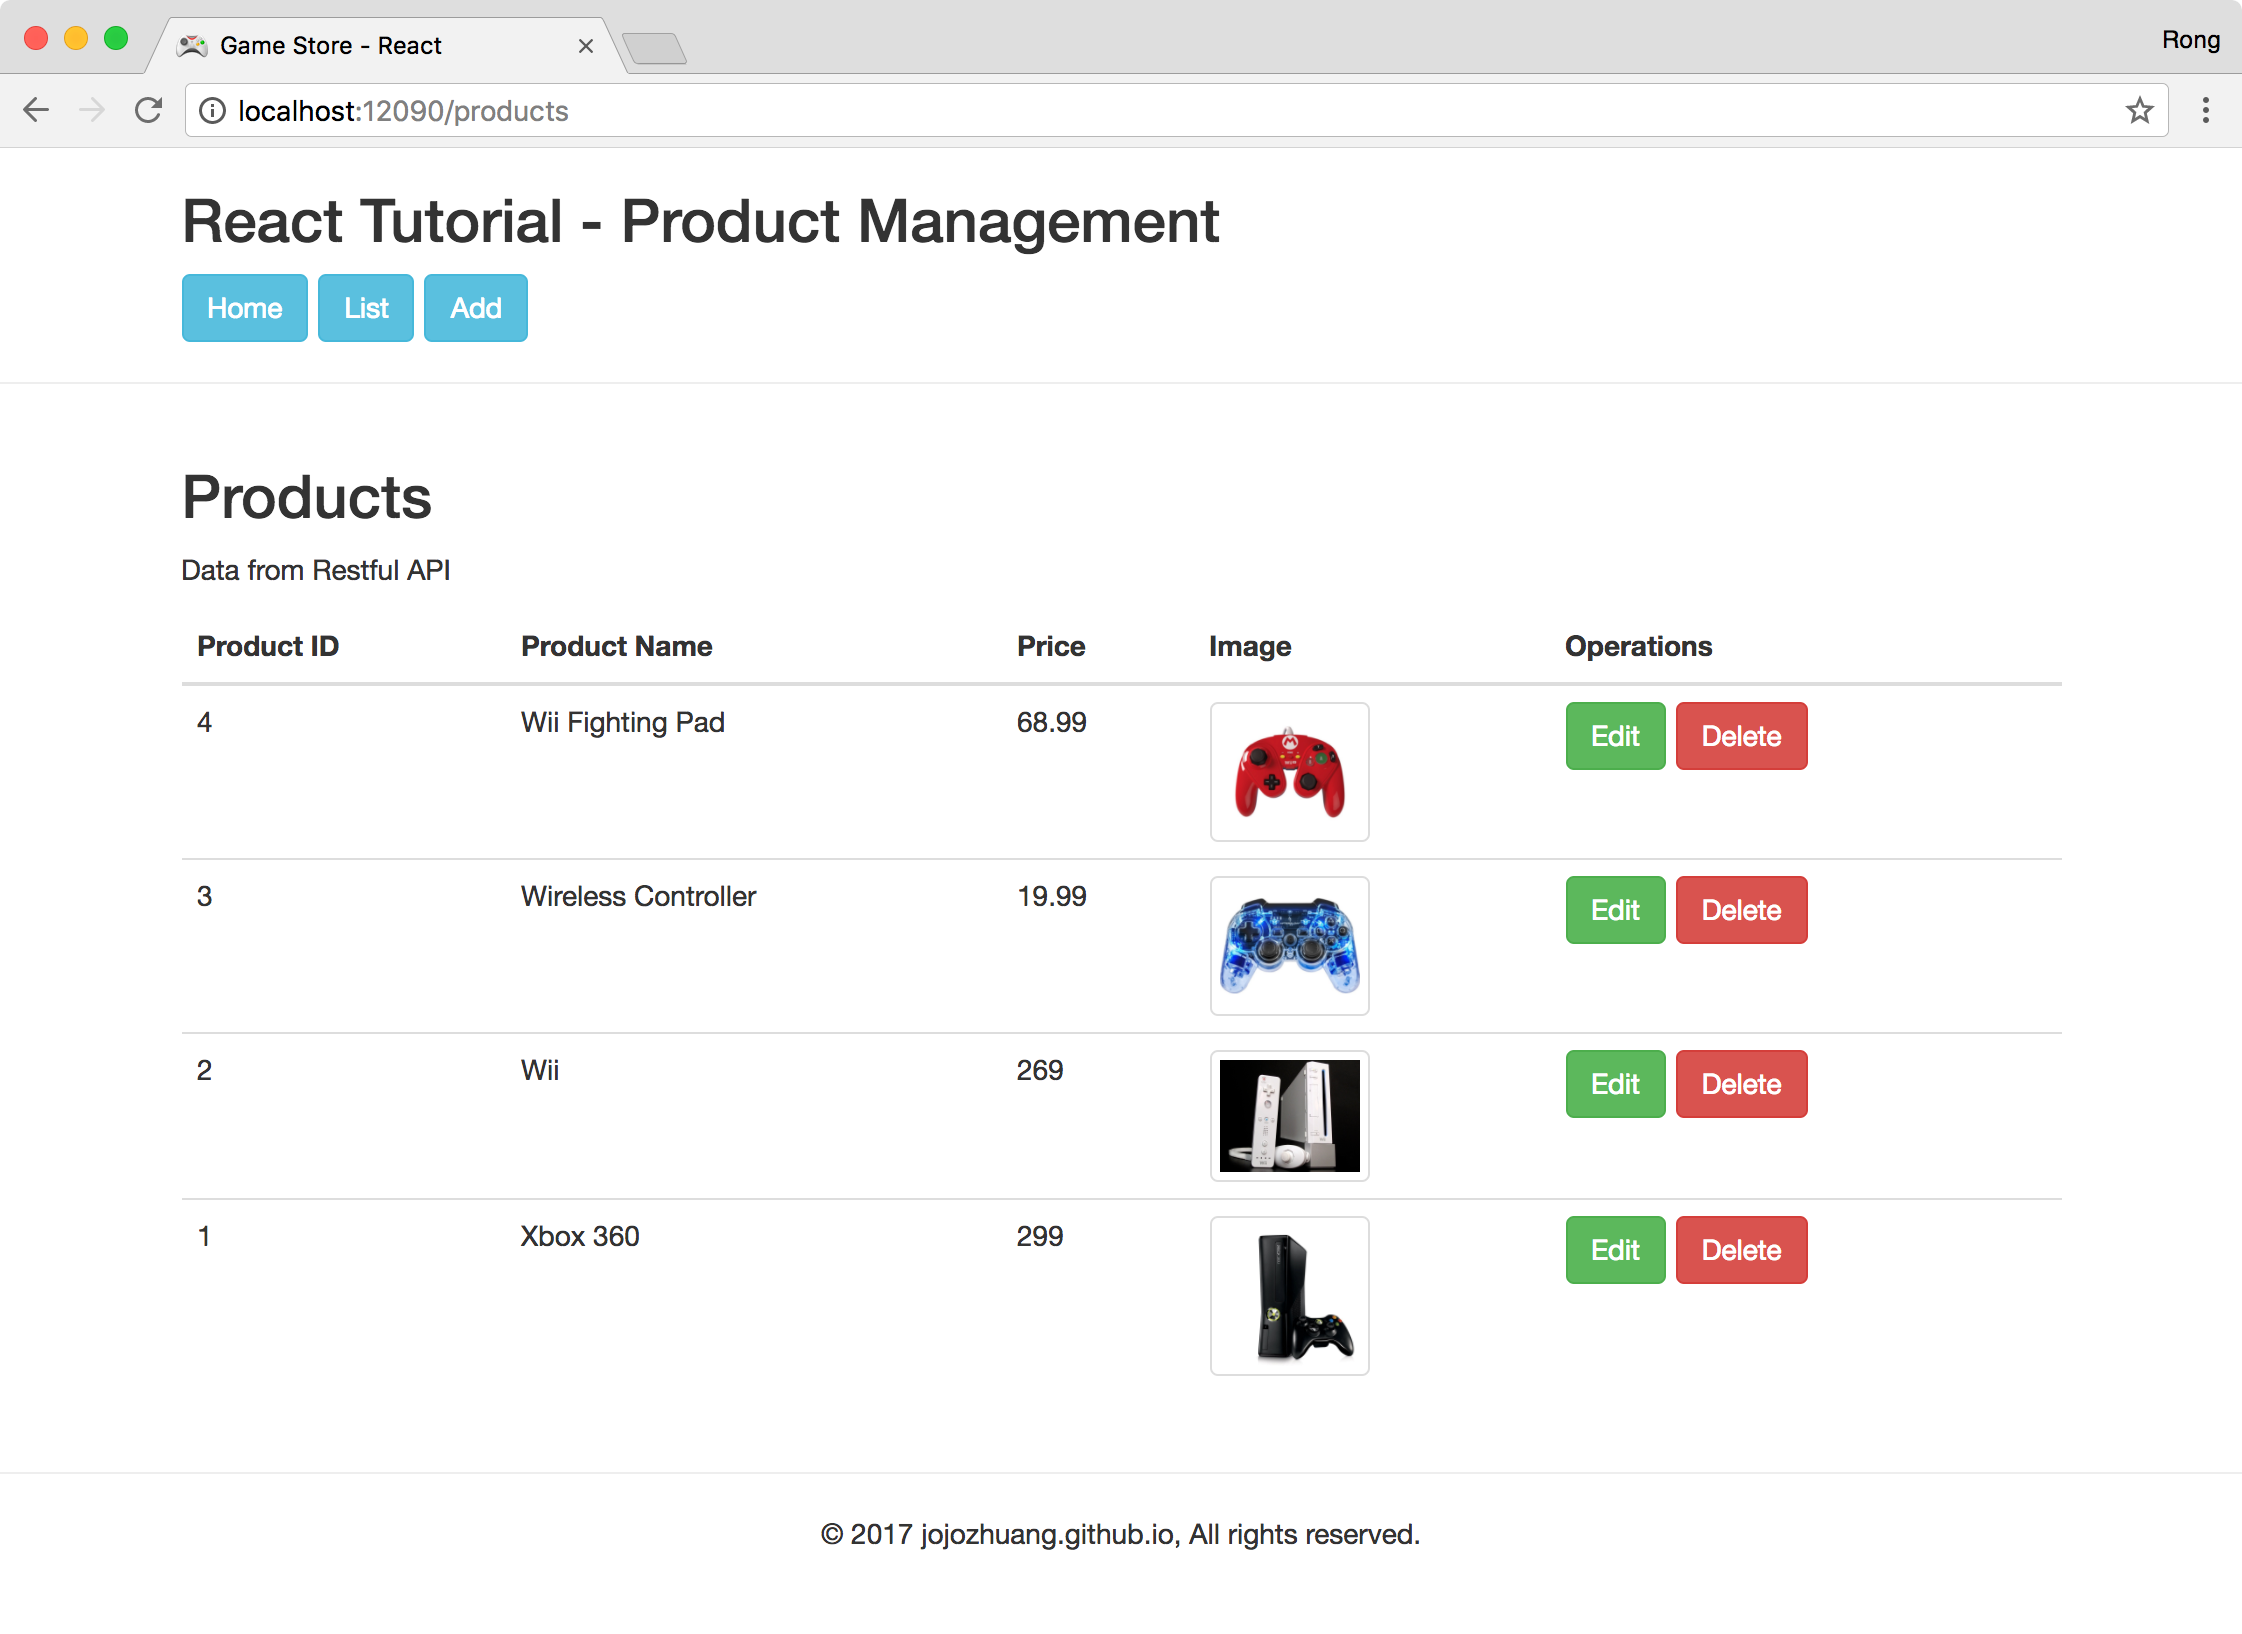
 Click the List button. There are three products with images.
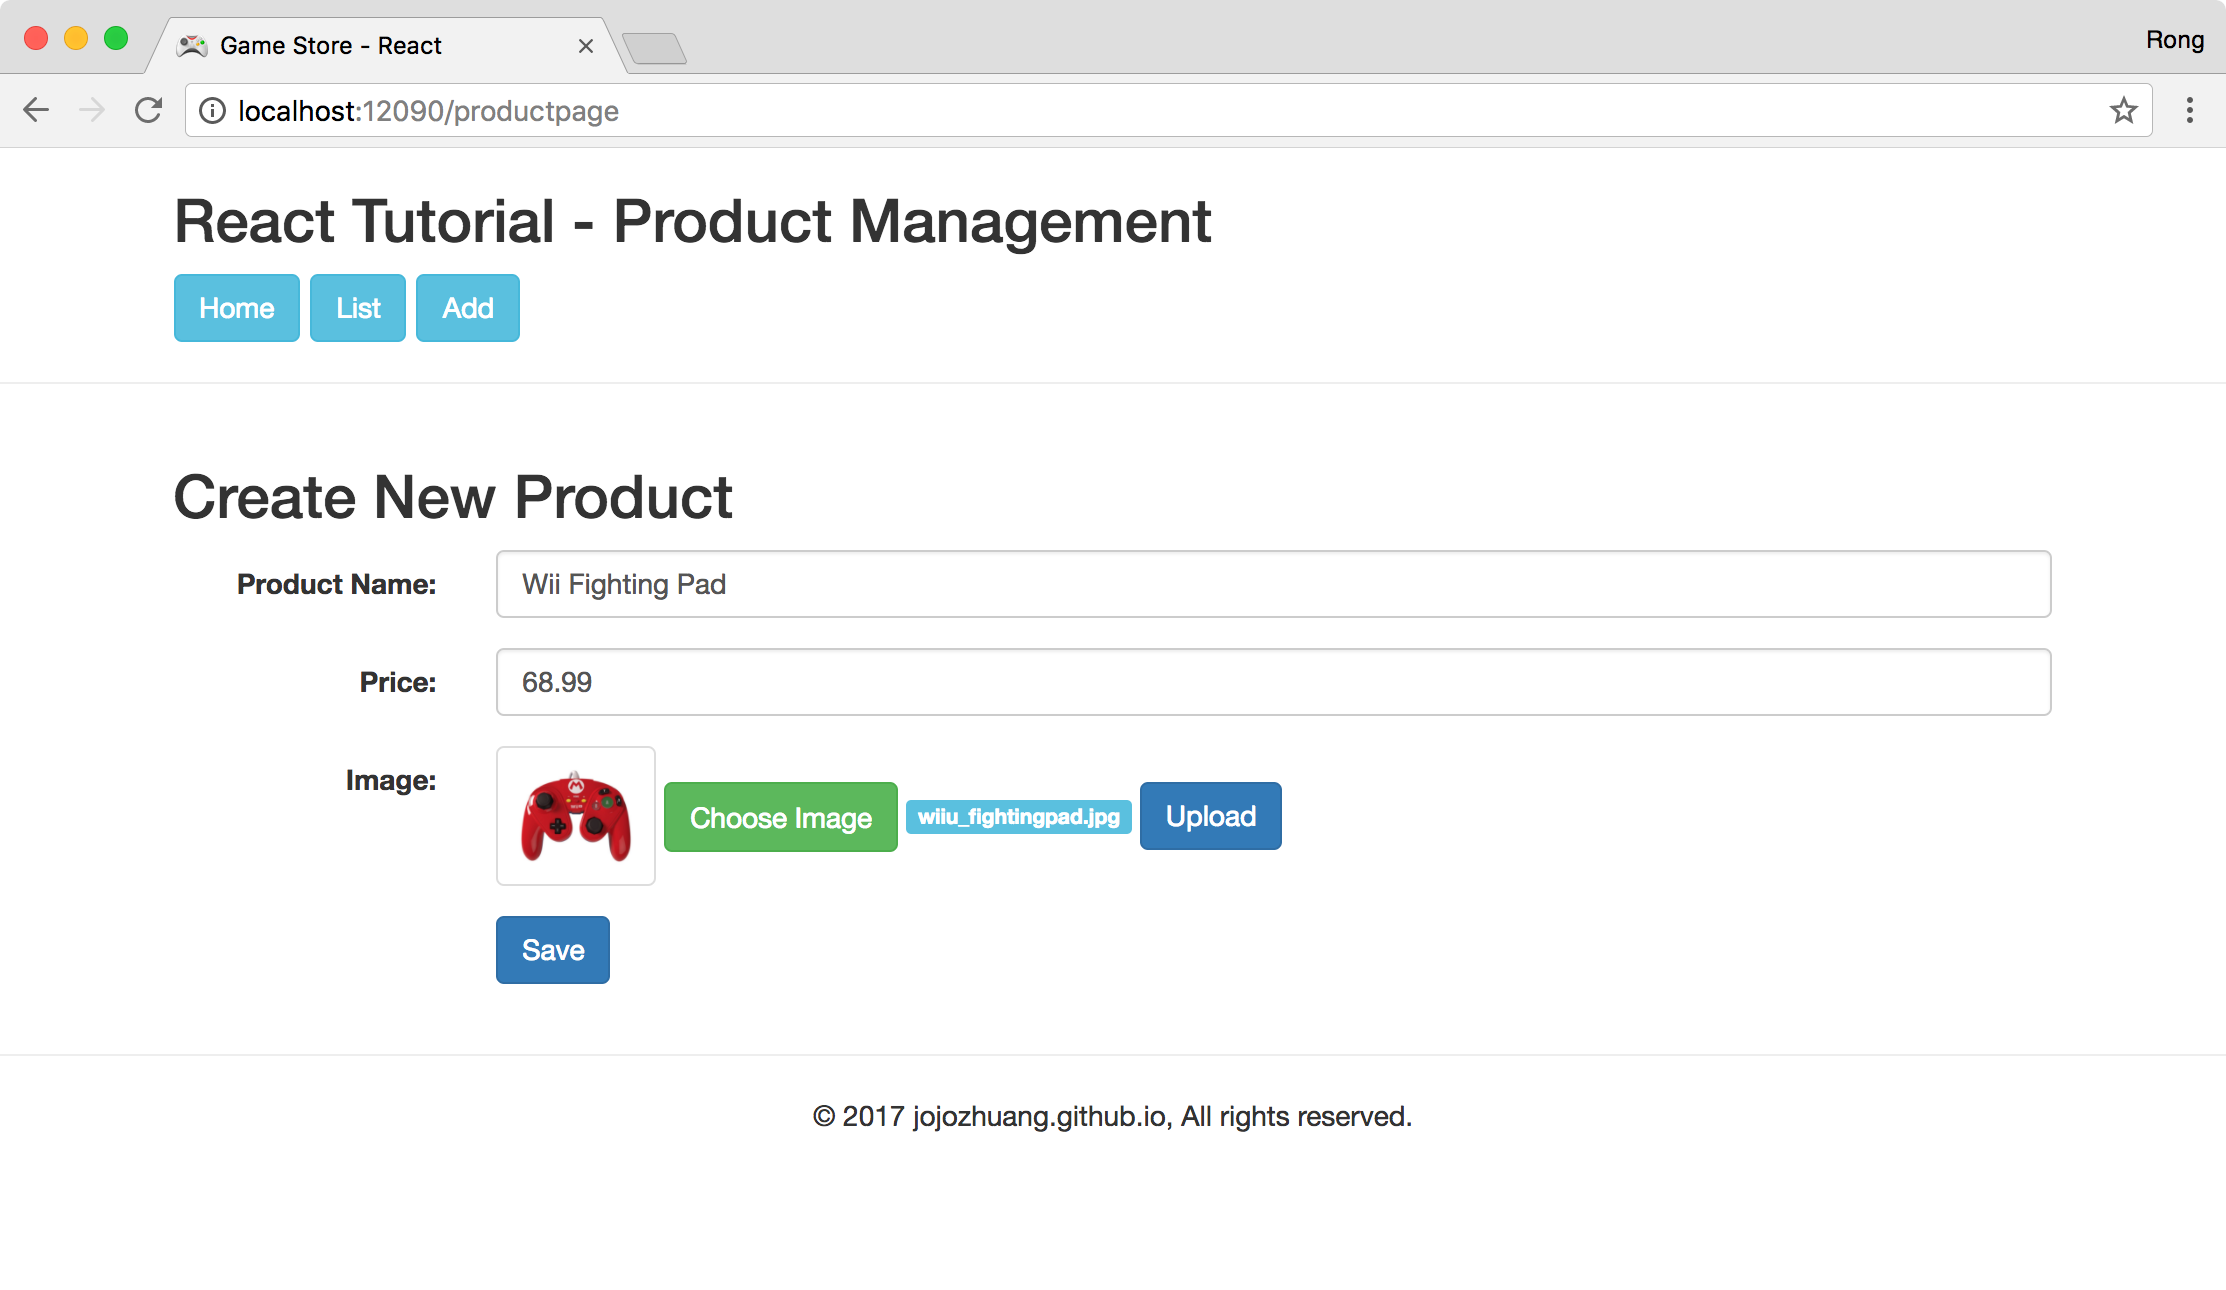
 Click the ‘Create’ button, input product name and price. And click ‘Choose Image’ to select an image from local disk. Then, click ‘Upload’ button to upload it to the remote server. The image will be displayed at the left side.
 Click ‘Save’ button, product is saved.
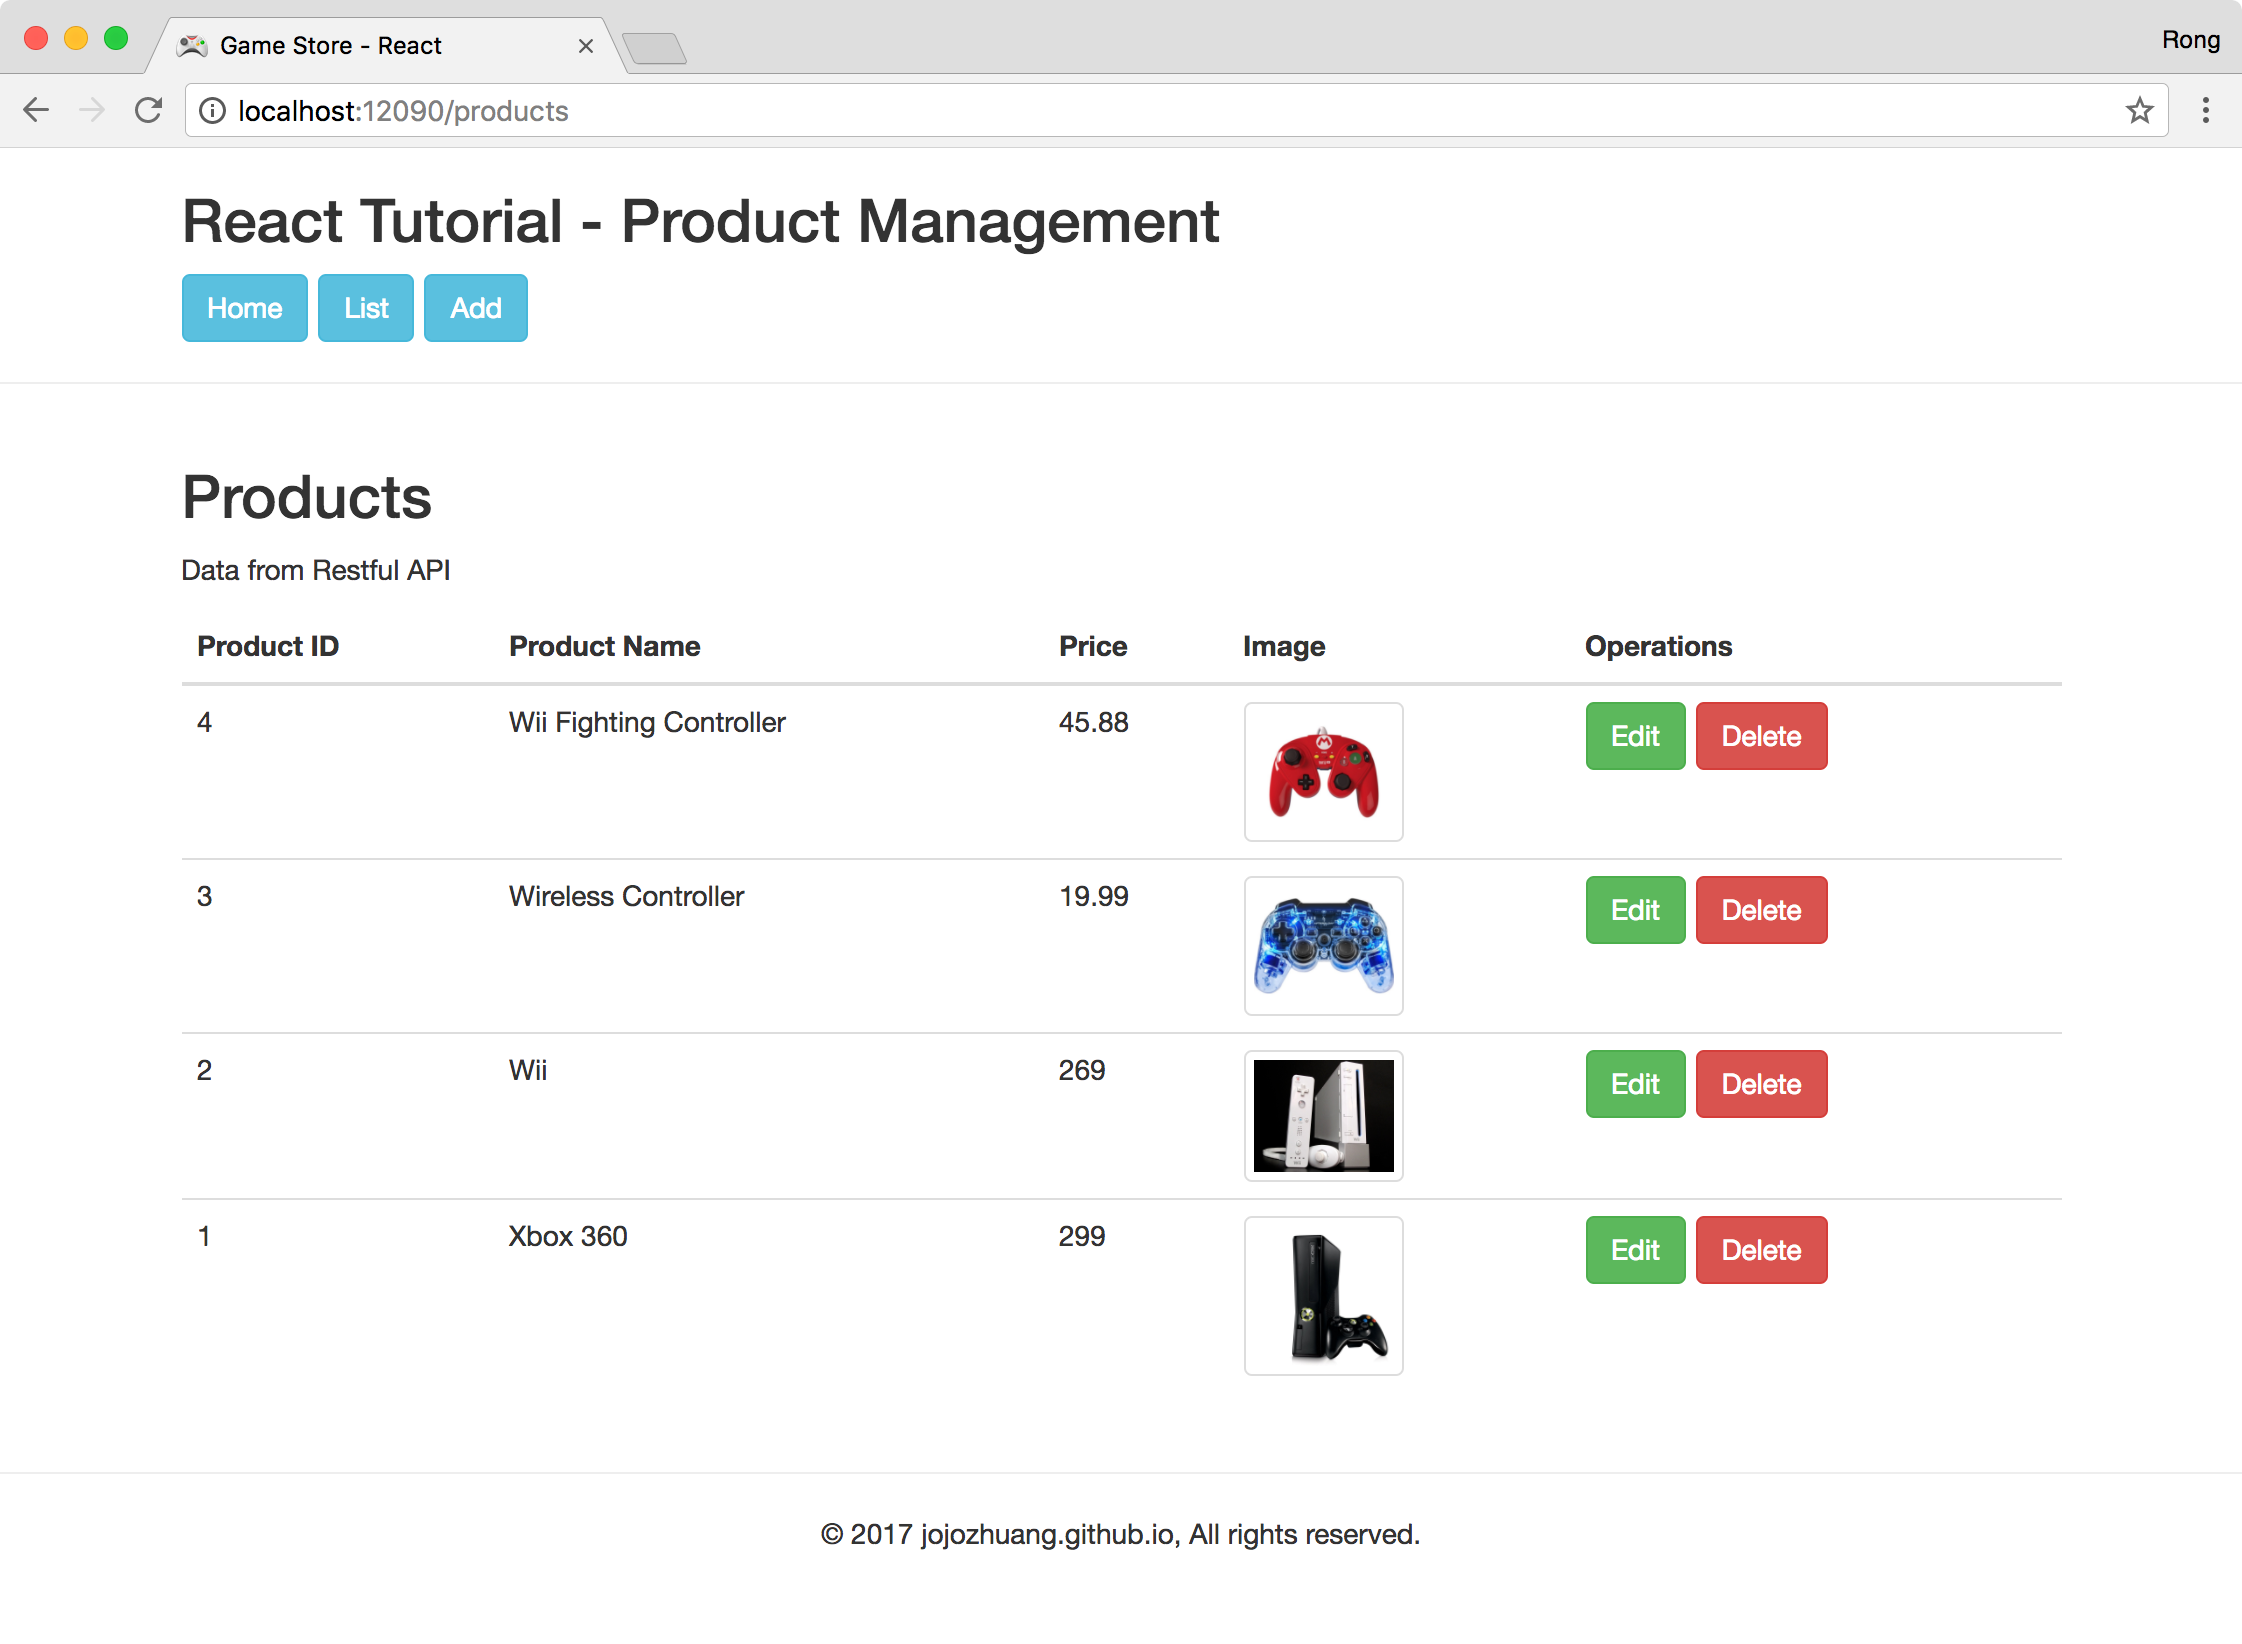
 Click ‘Edit’ button of the new product. Change the product name and price.
 Click ‘Save’ button, product(ID=4) is updated.
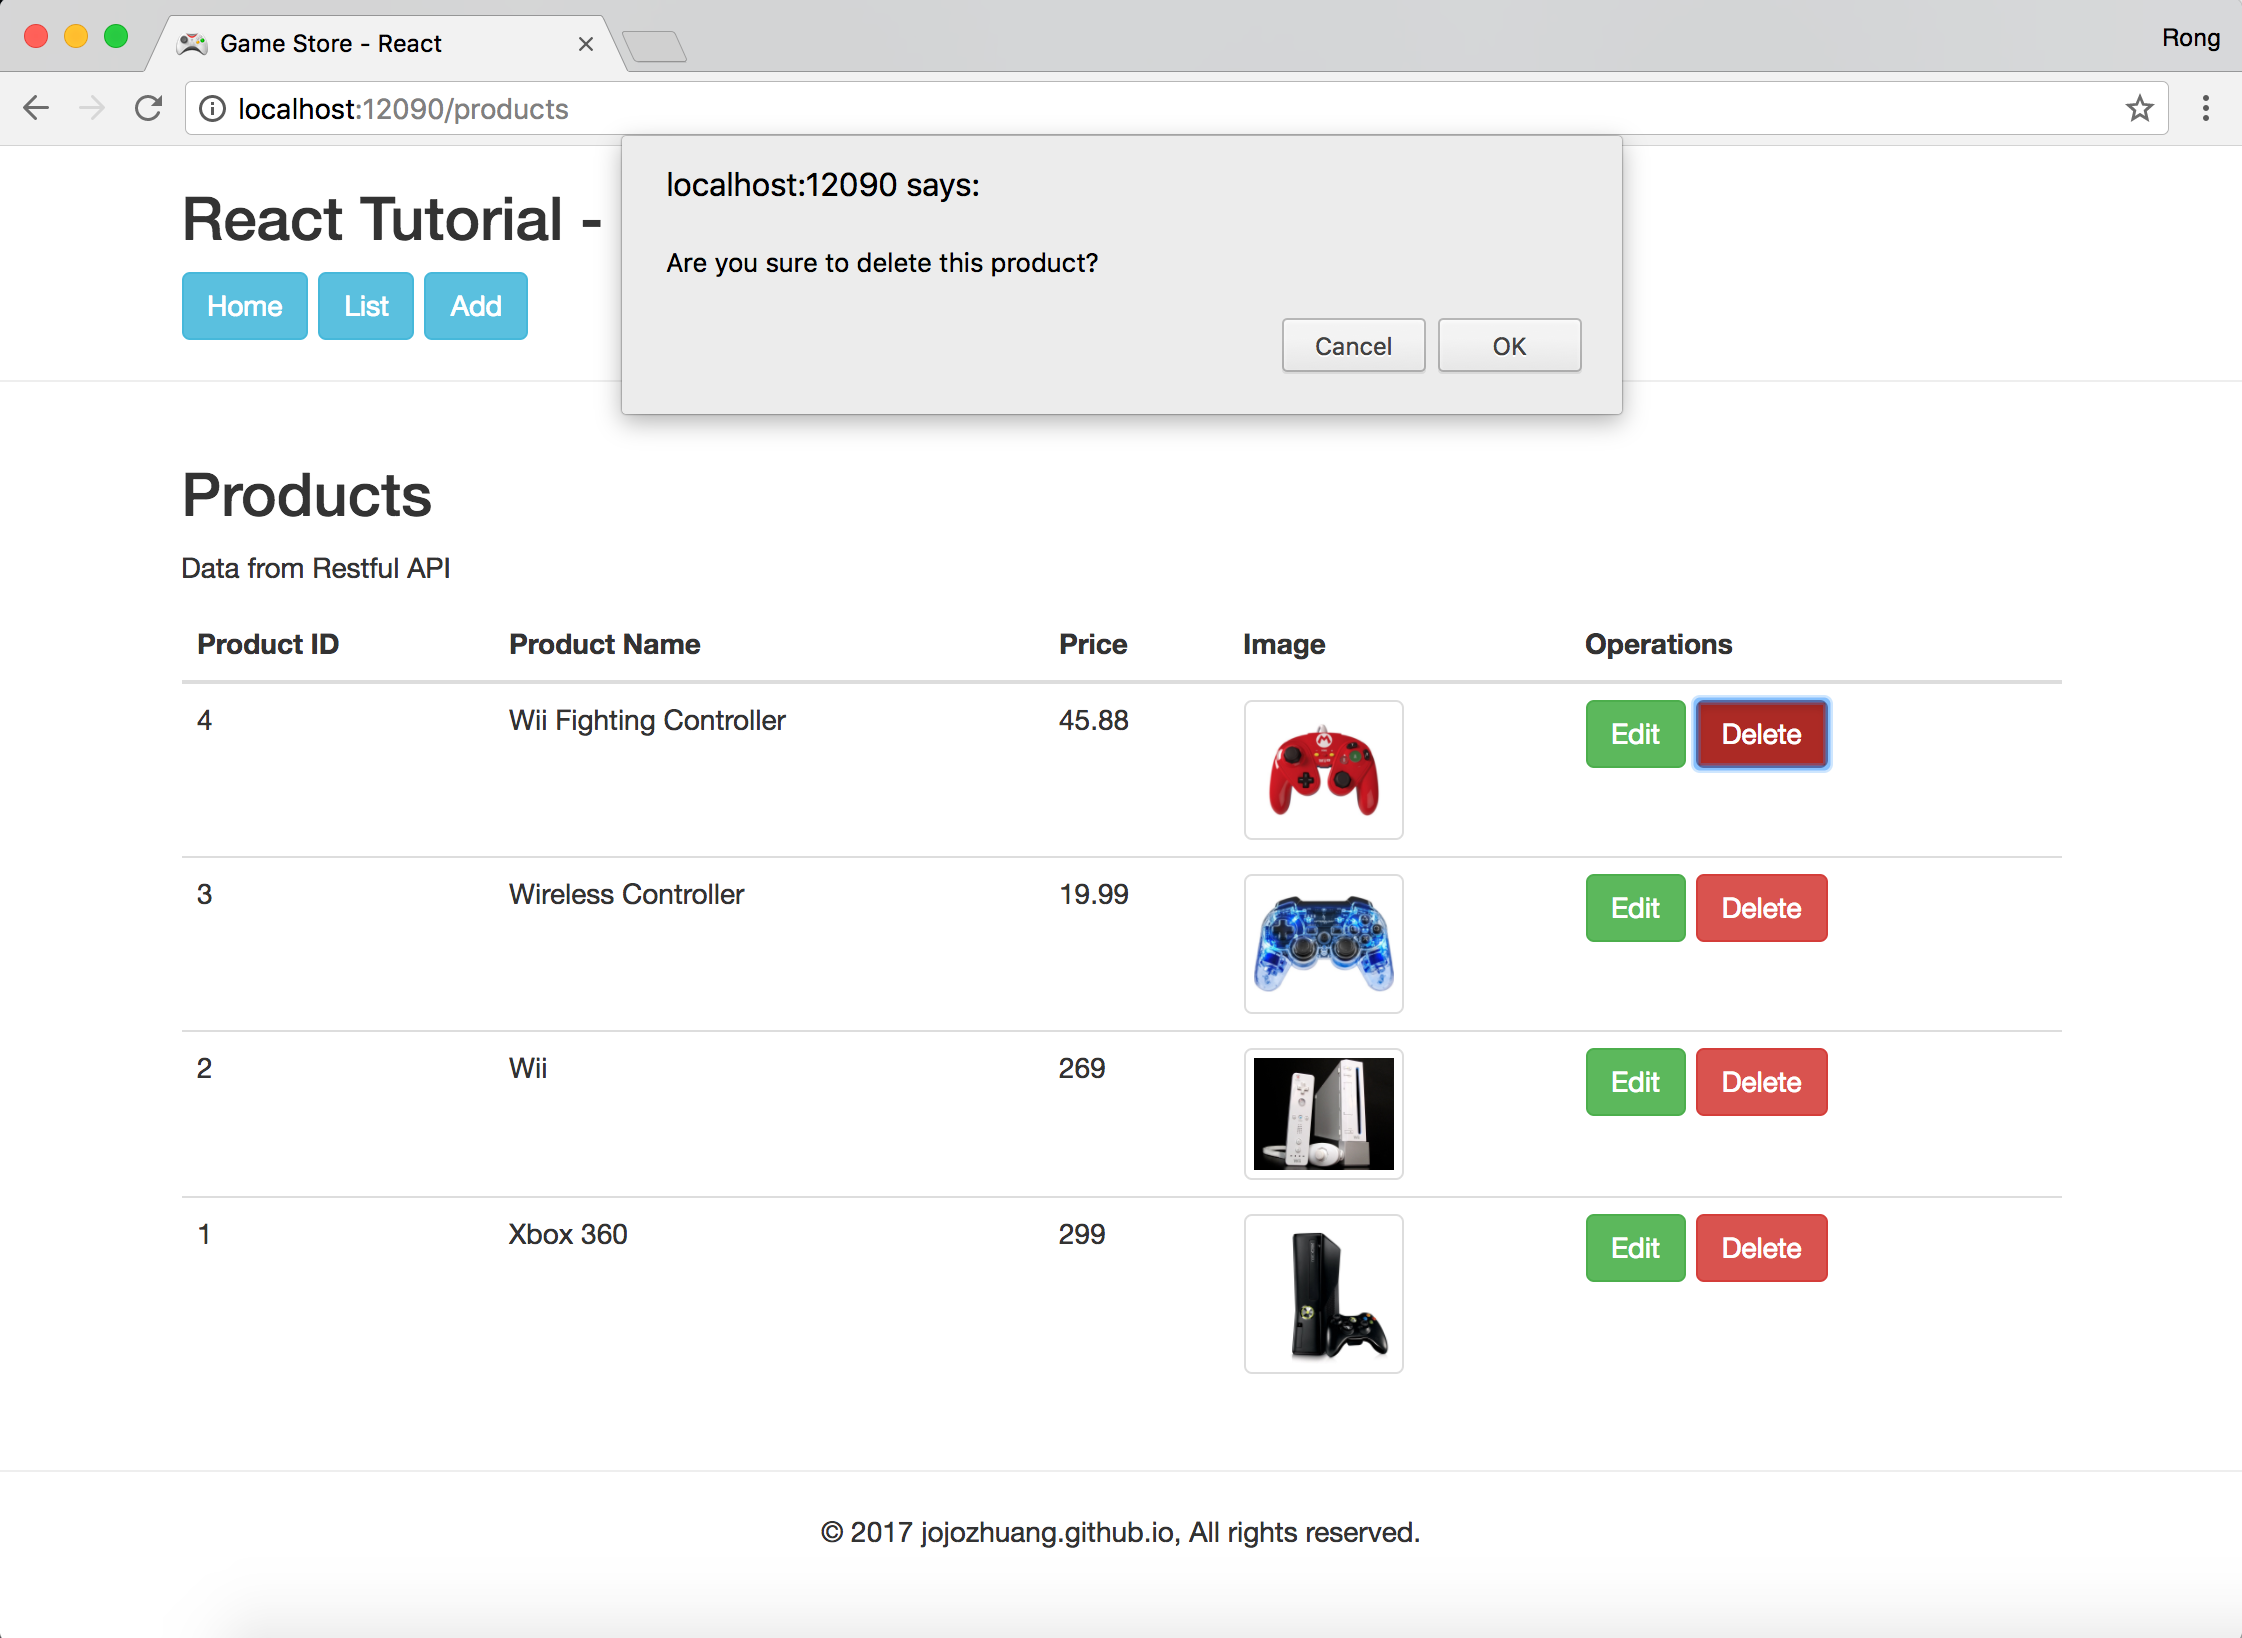
 Click ‘Delete’ button of the last product. A popup window for confirming the delete operation shows up.
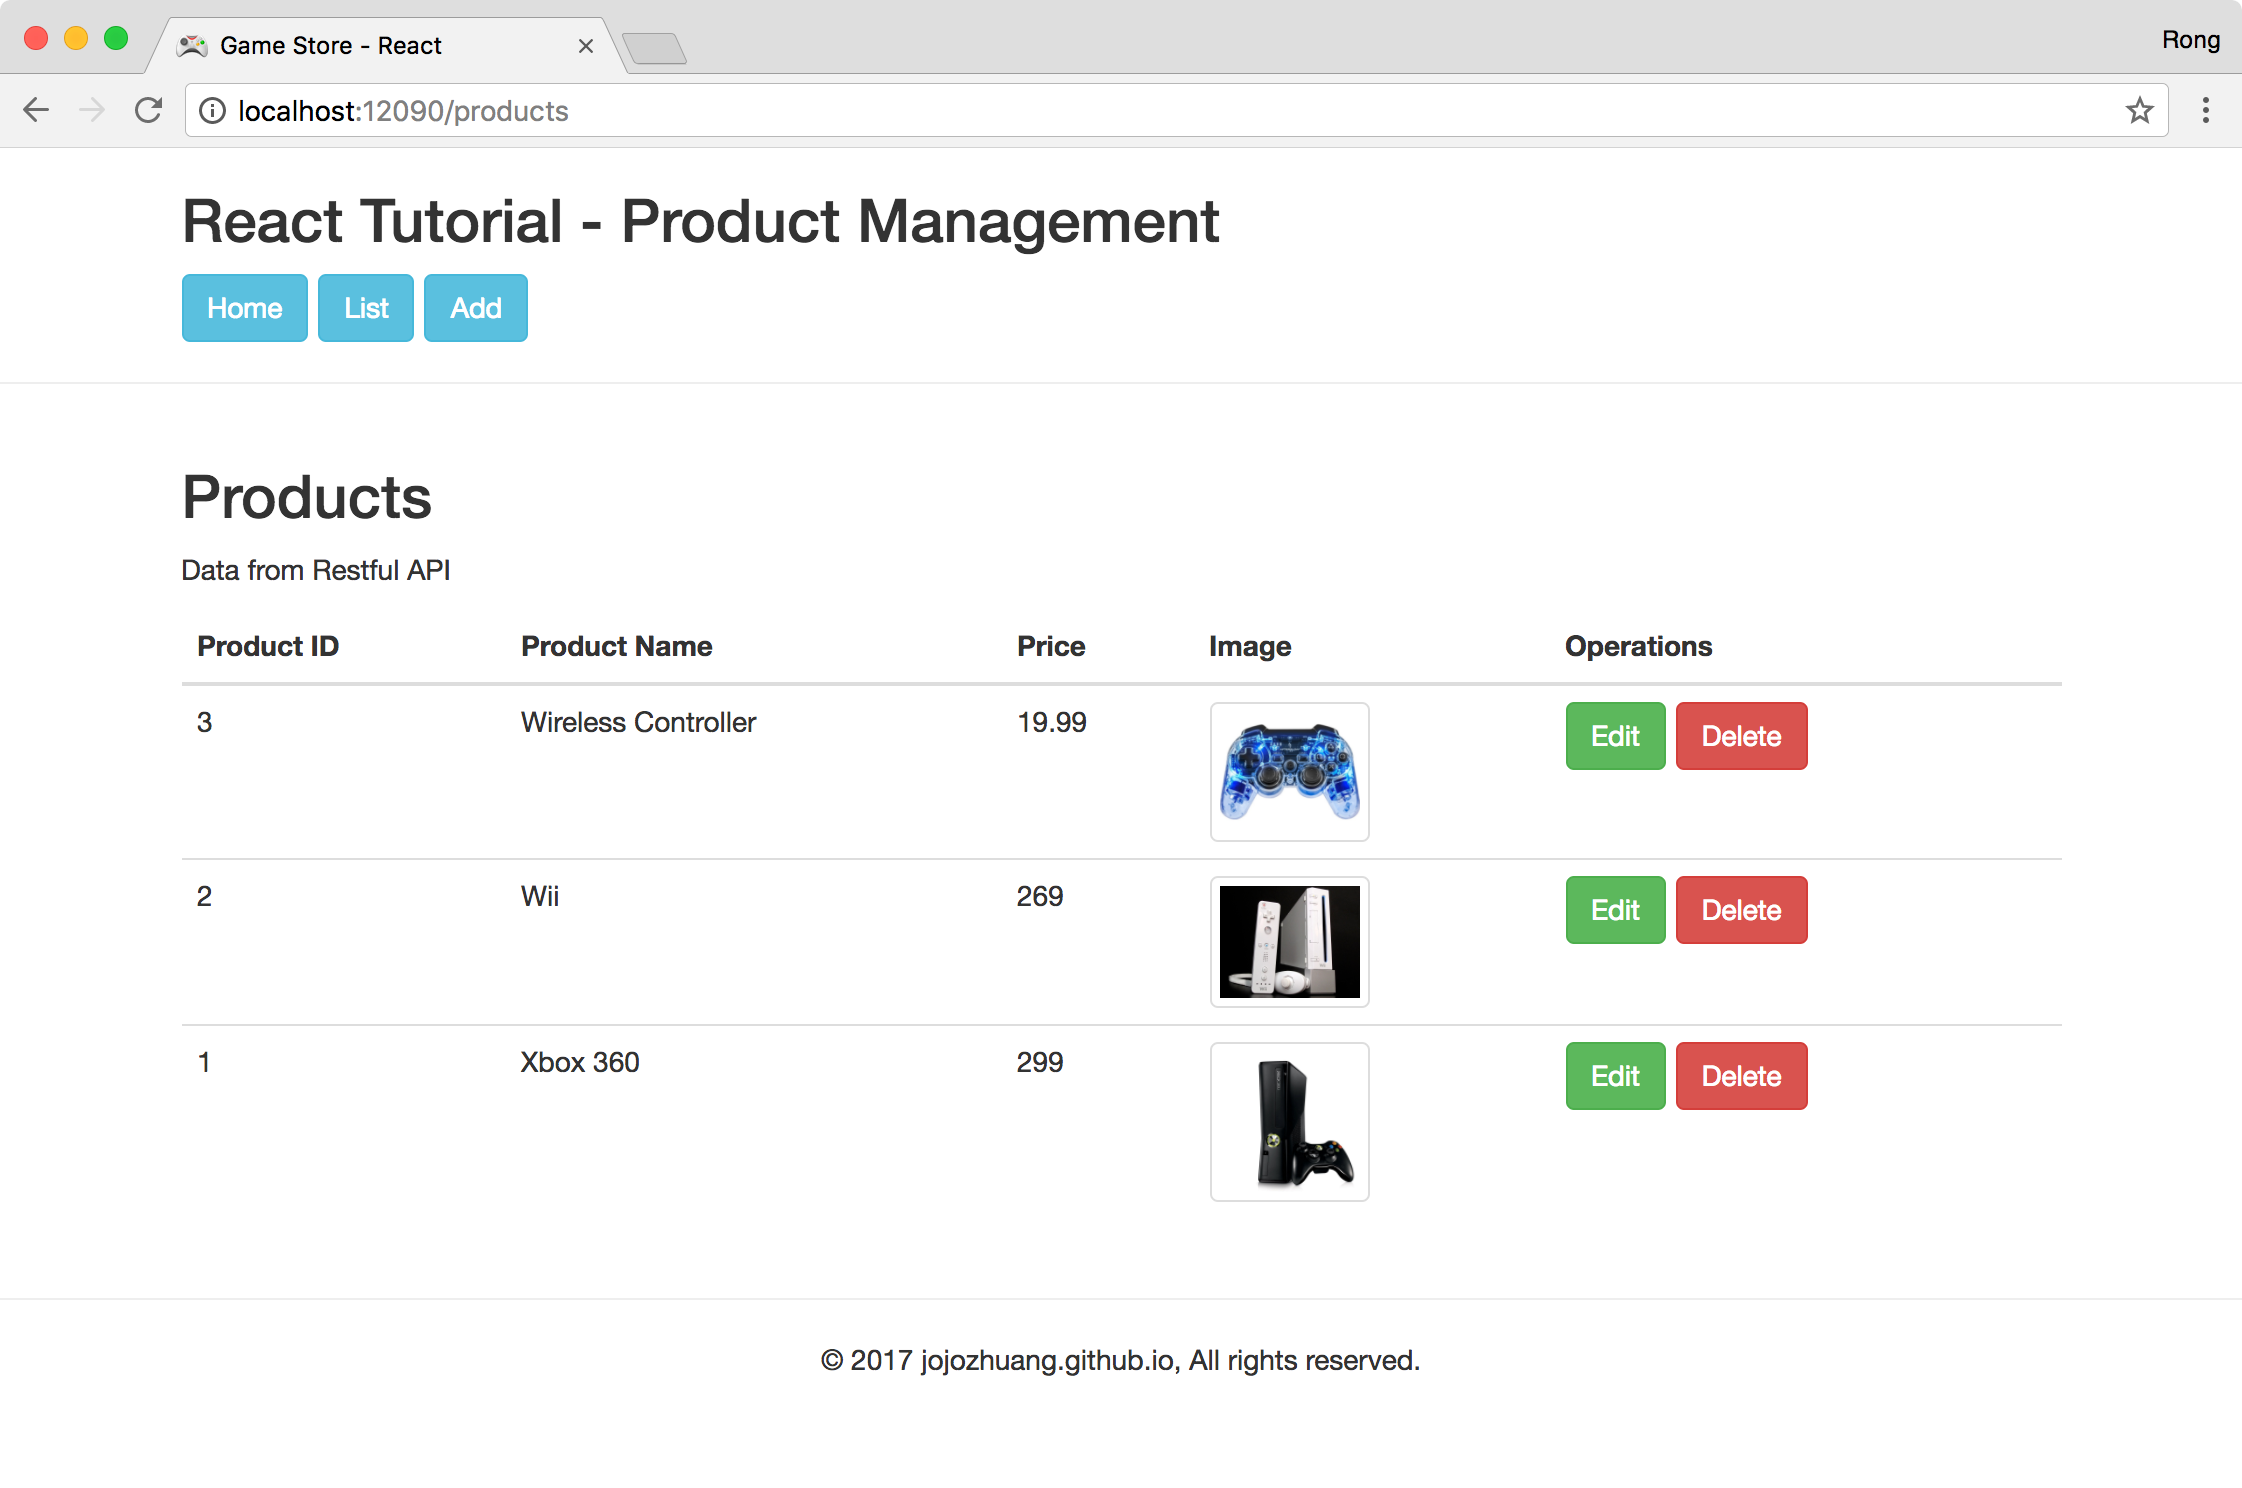
 Click ‘OK’ button, product will be deleted.
5. Source Files
- Source files of Game Store(React) on Github
- Source files of RESTful API(ASP.NET Core) on Github
- Source files of RESTful API(Spring Boot) on Github
6. References
- Official Docs
- Handling Events
- File Upload Sample
- A Simple React Router v4 Tutorial
- Building a Simple CRUD App with React + Redux: Part I Intro
- Source Code
- Official Components
- React AJAX Best practices
- Simple React File Upload · GitHub
- React Workshop
- Routing React Apps: The Complete Guide
- React Router v4 Unofficial Migration Guide