8116. Jekyll - Comments with DisqusDisqus
Use Disqus to enable reader to comment on Jekyll site.
1. Disqus
Disqus is a worldwide blog comment hosting service for web sites and online communities that use a networked platform.
2. Installing Disqus
2.1 Registration
Go to https://disqus.com/ to create a Disqus account. Login and go to settings->profile, set your name. This name will be used as short name for your site.

2.2 Universal Code
Access the following link to find the universal code of your Disqus. Replace the shortname with yours.
https://[shortname].disqus.com/admin/universalcode

//e.g.
https://jojozhuang.disqus.com/admin/universalcode
Copy the scripts and use it to create an include file in your Jekyll site, e.g. disqus.html.
<div id="disqus_thread"></div>
<script>
    /**
     *  RECOMMENDED CONFIGURATION VARIABLES: EDIT AND UNCOMMENT THE SECTION BELOW TO INSERT DYNAMIC VALUES FROM YOUR PLATFORM OR CMS.
     *  LEARN WHY DEFINING THESE VARIABLES IS IMPORTANT: https://disqus.com/admin/universalcode/#configuration-variables
     */
    /*
    var disqus_config = function () {
        this.page.url = PAGE_URL;  // Replace PAGE_URL with your page's canonical URL variable
        this.page.identifier = PAGE_IDENTIFIER; // Replace PAGE_IDENTIFIER with your page's unique identifier variable
    };
    */
    (function() {  // DON'T EDIT BELOW THIS LINE
        var d = document, s = d.createElement('script');

        s.src = 'https://jojozhuang.disqus.com/embed.js';

        s.setAttribute('data-timestamp', +new Date());
        (d.head || d.body).appendChild(s);
    })();
</script>
<noscript>Please enable JavaScript to view the <a href="https://disqus.com/?ref_noscript" rel="nofollow">comments powered by Disqus.</a></noscript>
2.3 Including Disqus
In your template, include the ‘disqus.html’ file.
---
layout: default
key: tutorial
---
<script>
  $(document).ready(function(){
    $('img').addClass('image-software');
    $('img').addClass('img-responsive');
  });
</script>
<div style="background:transparent !important" class="jumbotron">
  <div class="container">
    <div class="col-sm-1"></div>
    <div class="col-sm-10">
      <h1>{{ page.index }}. {{ page.title }}</br><small>{{ page.tags | array_to_sentence_string }}</small></h1>
      {% include pagination.html %}
      <hr>
      {{ page.url }}
      <p class="meta">{{ page.date | date_to_string }}</p>
      <div class="post">
        {{ content }}
      </div>
      <hr>
      {% include pagination.html %}
      <!-- Post comments -->
      <div class="notecomments">
        {% include disqus.html %}
      </div>
    </div>
    <div class="col-sm-1"></div>
  </div>
</div>
2.4 Comments in Posting
Open the page, you will see the comments.

3. Displaying Comments Count
3.1 Script for Count
Add the following script to the page where you want to display the count of page. For me, I added it to the include head.html file, so it can be applied to all pages, I don’t need to add one by one.
<script id="dsq-count-scr" src="//jojozhuang.disqus.com/count.js" async></script>
3.2 Getting Count
Append #disqus_thread to the href attribute in your links. For example,
<a href="http://jojozhuang.github.io/tutorial/basis/getting-started-with-linux/#disqus_thread">Comments</a>
In the list page, it is added to all the links through ‘tutorial.url’.
<div class="pull-left">
    <ul class="list-inline list-unstyled">
      <li><span><i class="fa fa-calendar" style="color:#bc2105"></i></span> {{ tutorial.date | date_to_string }}</li>
      <li>|</li>
      <li><span><i class="fa fa-comments" style="color:#008c25"></i></span> <a href="{{ tutorial.url }}#disqus_thread">Comments</a></li>
      <li>|</li>
      <li>
        <span><i class="fa fa-tags" style="color:#3B5998"></i> {{ tutorial.tags | join: ", "}} </span>
      </li>
      <li>|</li>
      <li>
      <!-- Use Font Awesome http://fortawesome.github.io/Font-Awesome/ -->
        <span><i class="fa fa-facebook-square" style="color:#3B5998"></i></span>
        <span><i class="fa fa-twitter-square" style="color:#1DA1F2"></i></span>
        <span><i class="fa fa-google-plus-square" style="color:#DB4437"></i></span>
      </li>
    </ul>
</div>
3.3 Demo
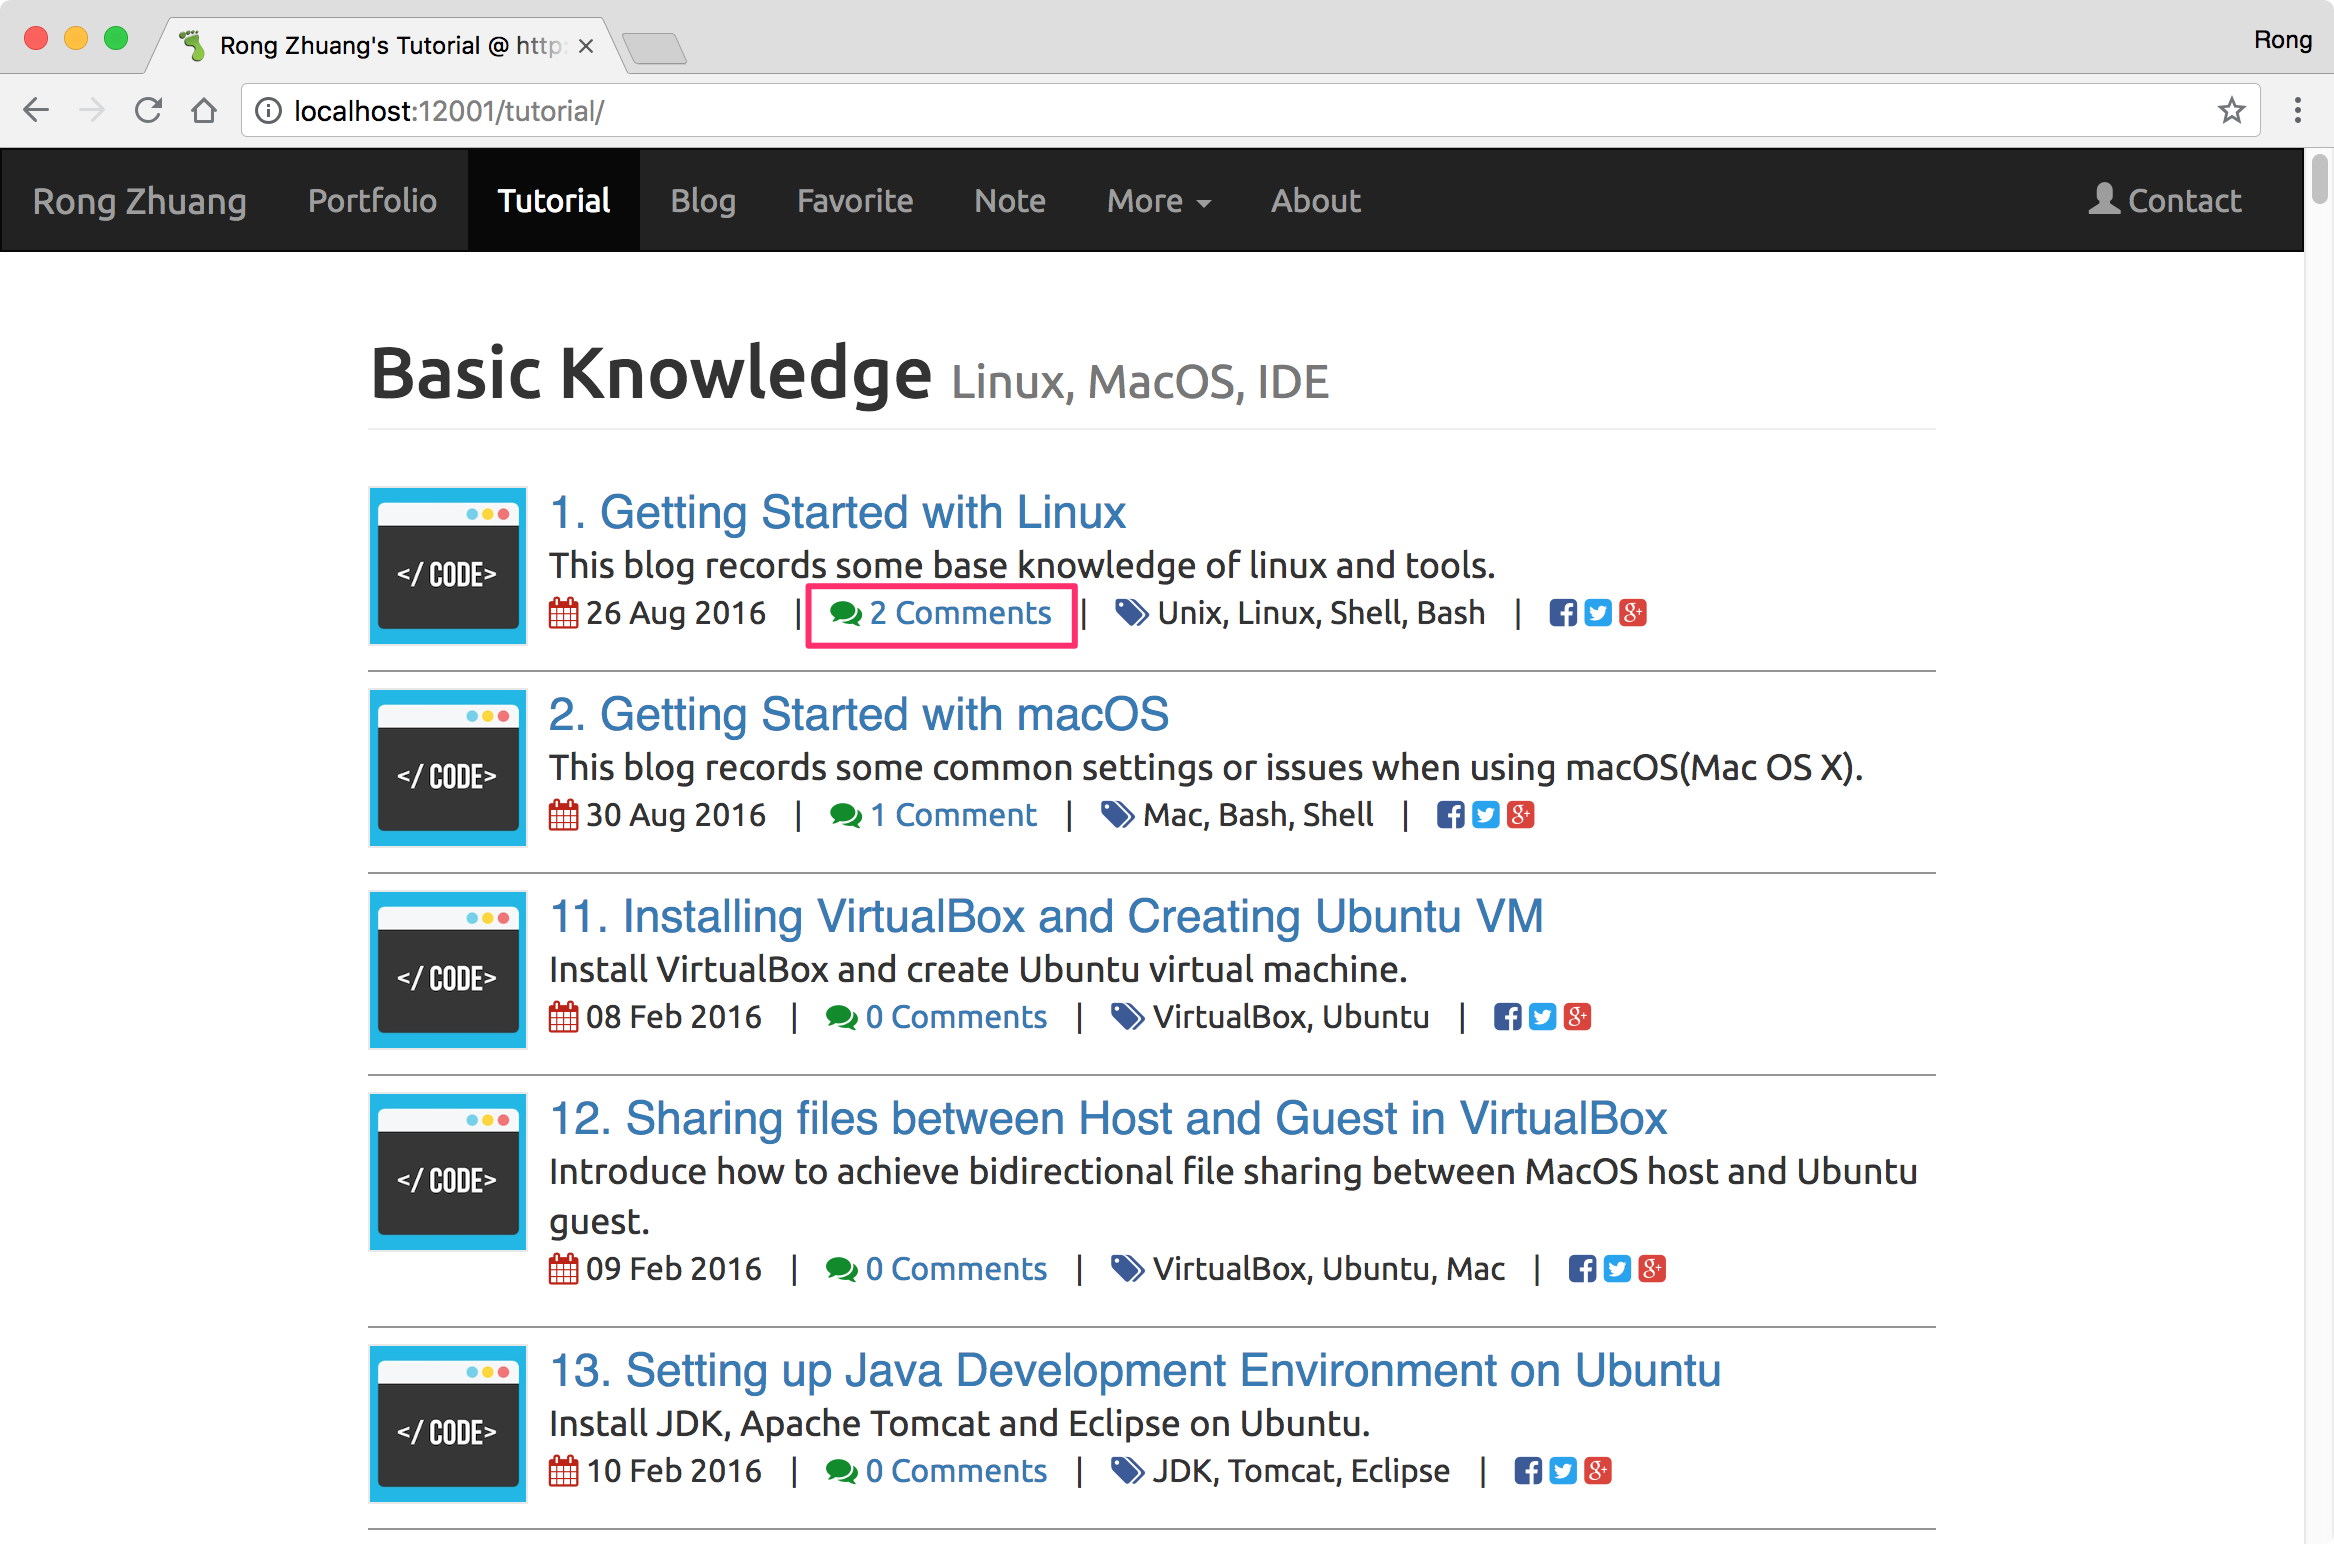
See the comments count is correctly displayed. Click on the link, it will navigate you to the comments on that page directly.
